4 No-Prep/Low-Prep Games to Practise Big Numbers

I can’t believe I am starting a new course. Did summer fly? It surely did and here we are again, about to begin a new course and greet a new batch of students. Batteries? Fully charged?
It’s been donkey’s years since I last wrote a post and although this is the first after a longish break and one that should be devoted to first-day icebreakers, I have seen and read so many good ones lately that I felt I wanted to write about something completely different.

One of the problems my students almost always have is saying numbers, especially big numbers so, wouldn’t it be great to start the course working with numbers while having some fun? It never hurts to start the course in a light mood. God knows they will have plenty to study in the coming months.

Some boring, yet necessary things you might want to tell your students before you start playing.
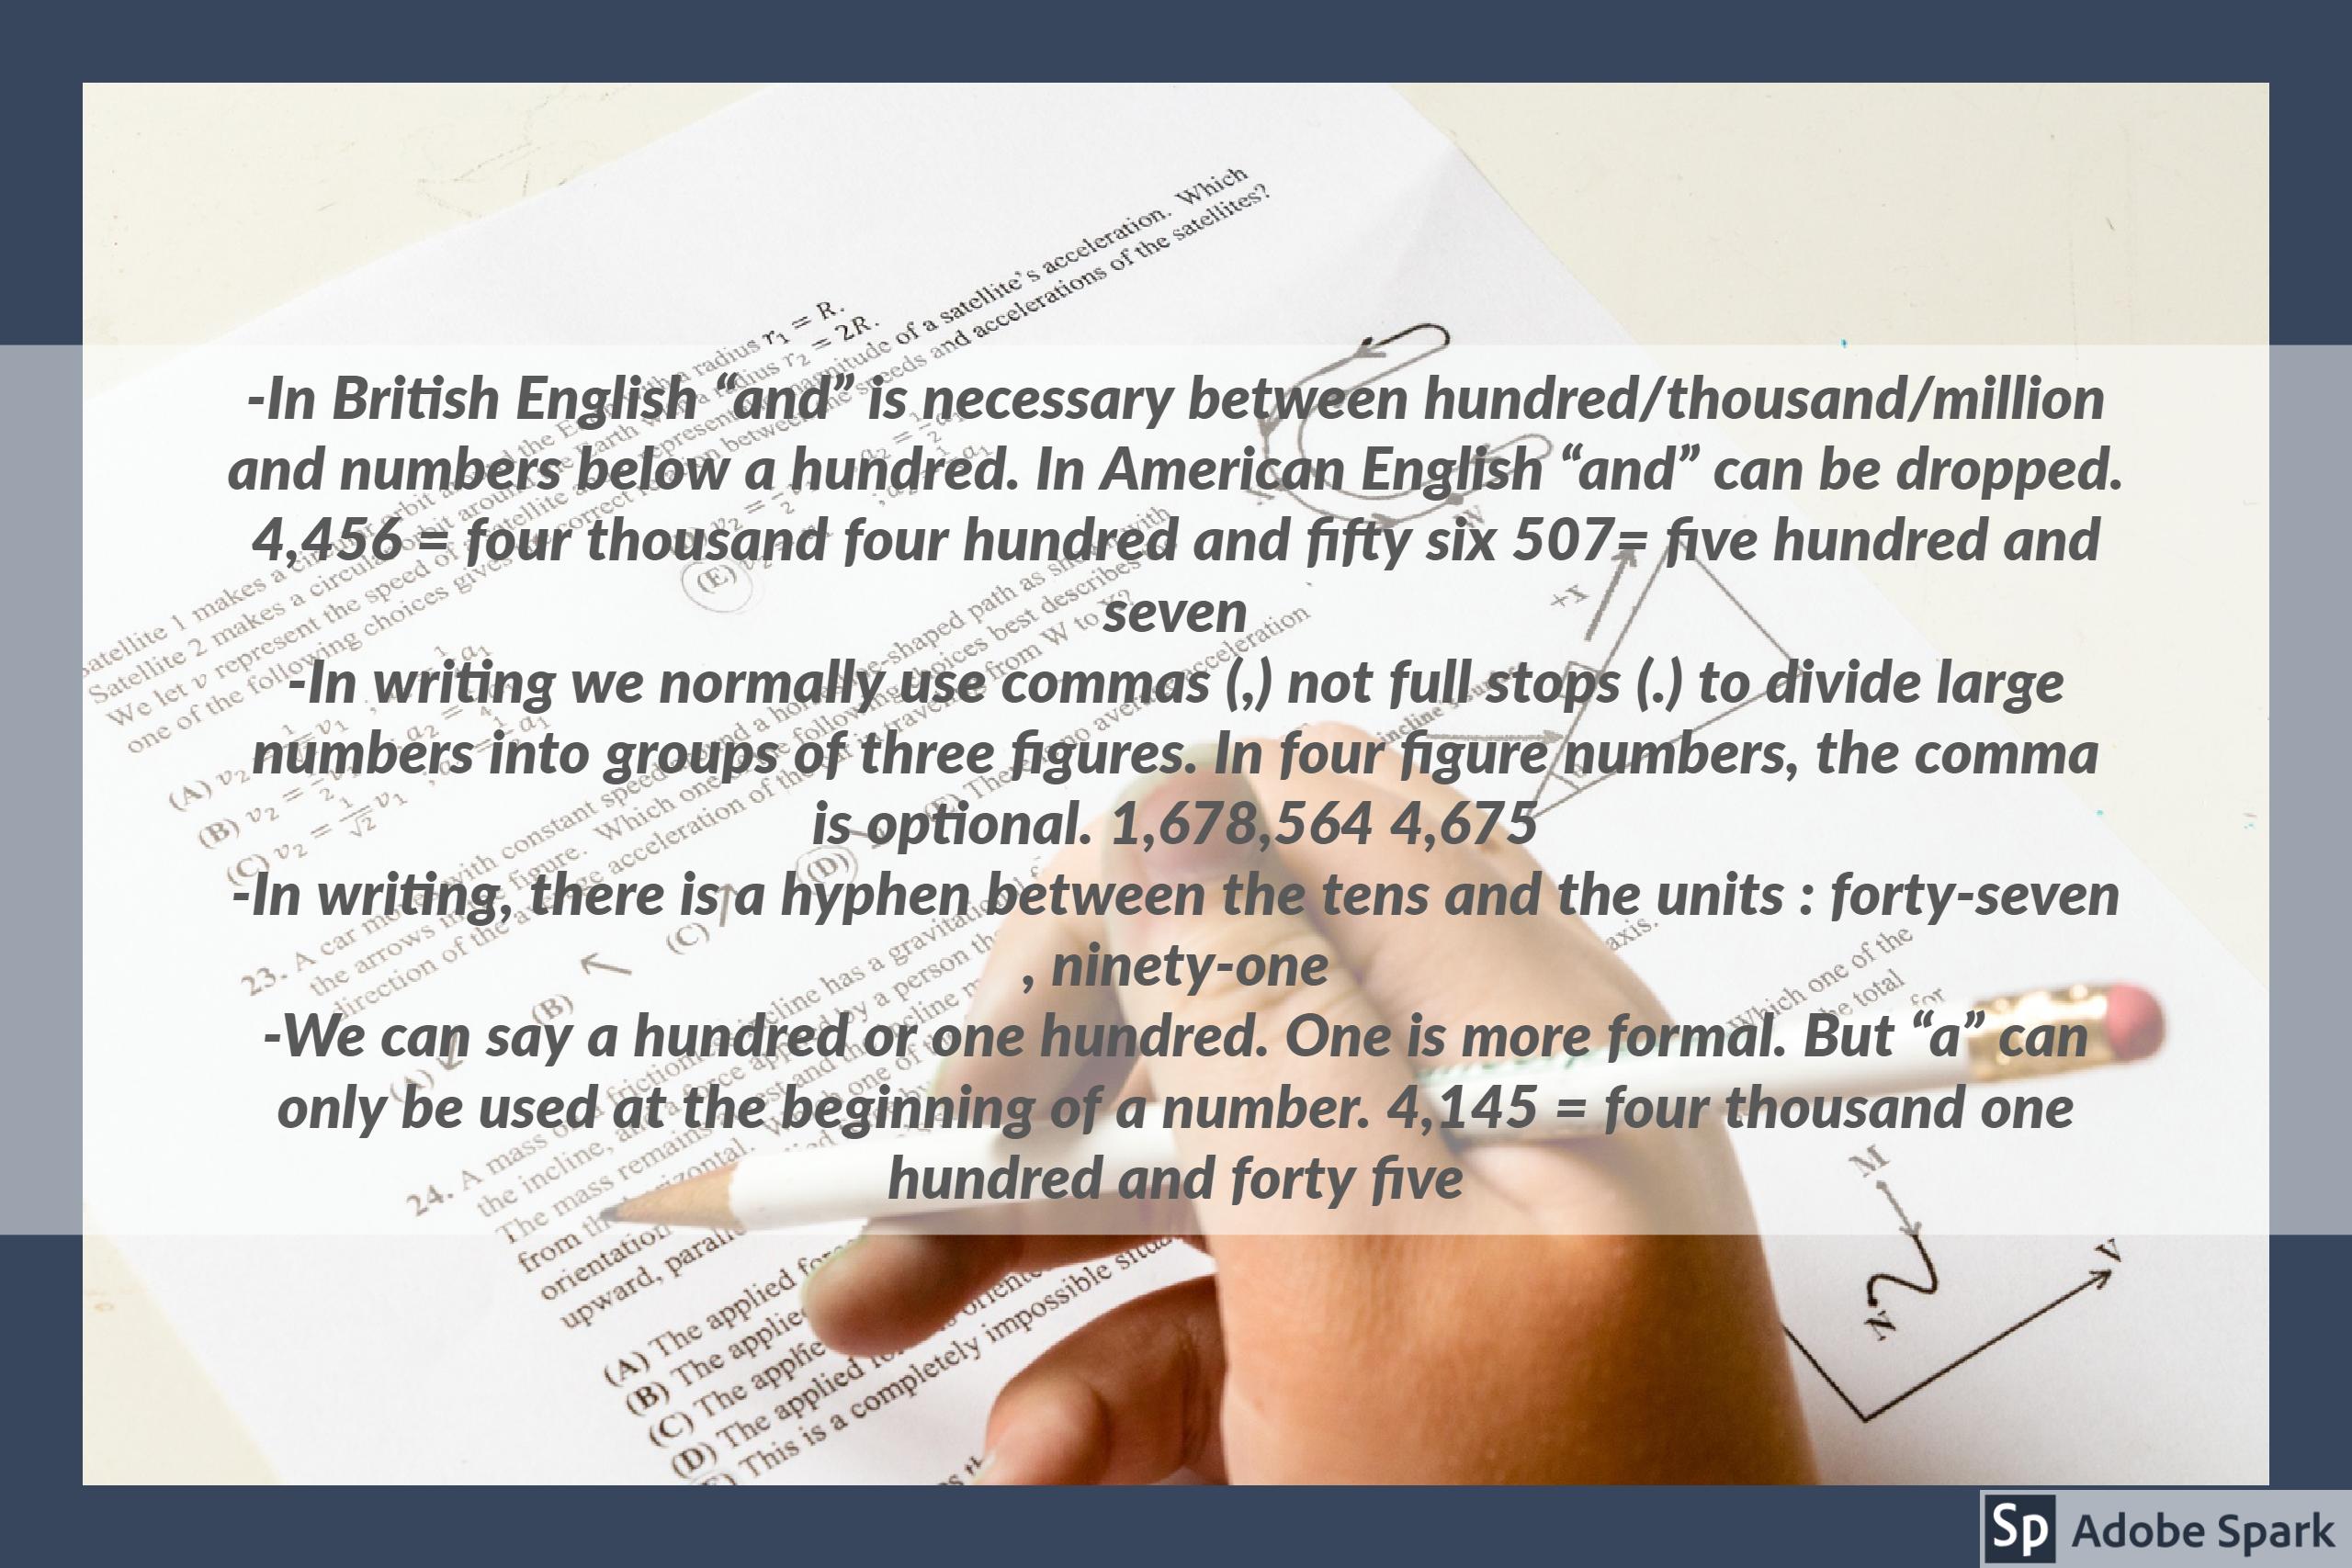
BEFORE THE GAMES, REVISE

Before you start, it would be a good idea to revise how to say large numbers in English.  You can use this video for “inspiration”. Although the teacher in the video certainly goes out of her way to teach big numbers, I find that it”s not in my nature to go to such lengths so something that I always do and that my students enjoy is the following:  I start by writing a small number on the board and ask my students to say it. Then, I add a new number to its left, like this:

  • 5,
  • 35,
  • 635,
  •  4,635
  • 74,635
  • ..etc ( make it real big)

Every single time they have to say “and” (BrE), I make a gentle cutting gesture with my hand. Then I put them in pairs and they try with a new number.

THE GAMES

WHAT’S THE POPULATION OF…?

Ask students: Can you guess the population of the smallest capital city in the world?  As students make their guesses,  correct any mistakes they might still be making.

 Ngerulmud, the capital city of Palau an island nation in the Pacific Ocean, only has 391 people.

In this challenging game, students will have to guess the population of a given capital city or country.

  • Ask students to work in twos or threes.
  • Give each team a slip of paper. Tell them they will need to write their answer there, big enough to see from a distance.
  • Write on the board or display a picture of a well-known country or capital city and ask students to guess its population.
  • Allow one minute and then ask them to show their answer to the class and read the figure.
  • The team that is closest to the real figure gets one point.


THE PRICE IS RIGHT.

Have you ever watched The Prize is right” and wished you could play? Here’s your chance. If there is anybody out there who has never heard about this world-famous contest, here’s a clip from the contest to give you an idea of what it is about.

Rules of the game:  Participants try to guess the retail price of a chosen object.  Whoever is closest to the actual retail price without going over wins the object. If all the participants overbid, the lowest bid is announced and they’ll need to guess again.

Before the game: You’ll need to find pictures of different objects and bring them to class. A good source for pictures, description of the product and prices is Amazon, ( in case you are wondering, no, this is not a sponsored post :).If you like using new technology in the classroom, you can always make your own flip cards. (see mine here)

Note: Revise how to say prices in English and the name for the currency you are going to use in the game.

How to play in class:

  • Divide the class into teams of three.
  • Give each team as many slips of paper as objects you are going to display.
  • Display an object, give a short description of it and ask students to guess its correct prize without going over it. Allow 45 seconds.
  • Ask students to show the slip containing their guess and ask them to read the number aloud for the rest of the class.
  • Award one point to the team that is closest to the actual retail price.
  • Repeat procedure.

If you feel students are having difficulty guessing prices, an easier variation would be giving teams the first figure.

GUESS THE NUMBER

This is a very simple but effective game that requires no preparation.

  • Students in pairs.
  • Student A thinks of a random number. Student B needs to guess it in as few attempts as possible.
  • Each time student A makes a guess, Student B should offer one of the following answers.

-My number is (much/ a bit) bigger
-My number is (much/ a bit) smaller
-Exactly! You did it!

A MAD RAFFLE

Before the class, select a few inexpensive things you want to give away such as some chewing gum, a pencil, a sweet, a sheet of white paper, a free homework pass…etc.

  • Tell students you’re feeling very generous today and with a lot of suspense and drama show the first item to be given away.
  • Briefly describe the item as if it were priceless: for example, tell them it is the first chewing gum that helps people pronounce English like a native… or some other silly reason.
  • Tell students that to get the prize they will need to guess its exact price.
  • Decide on a price but don’t tell your students. Remember that the chewing gum is unique so you want to give it a prohibitive price. Let’s say the retail price for the chewing gum is ₤ 765,888
  • Count the number of students and if there are 20 in class, tell them that the exact price is somewhere between ₤…. and ₤…. ( a window of 20 possibilities, ie, as many possible prices as students in the class) Write this range on the board.
  • Now, students need to shout out their guesses. Give the prize to the student who correctly guesses the price.

And you? Do you use any other games to practise saying big numbers?

Gone on Holiday! Back in October! + Most Popular Posts This School Year

The course is finished. That’s it! Another year has gone by. Times flies. I’m almost scared. One minute you’re greeting your new students and the next you are saying your goodbyes. OMG, life seems to be speeding up and before I know it, I’ll be greeting another batch of students.

Anyway, it’s June and, as usual I won’t be around until I resume classes, which will be at the end of September.

In between? More written and oral exams, some holidays, some brush up courses , the Camino de Santiago (St James’s way) and a long-awaited overseas trip. I’m also very excited to share with you that this summer I will be working creating content for Cambridge University Press, which I hope will share with you once I begin posting again. So, a busy summer for me!!

I hope to “see” you all next September. I’ll be calling the roll!!


Quiz: Persistent Spelling Mistakes and some Orthodox and Unorthodox Techniques to Get Rid of them

The course is almost finished.

Admittedly, I’m in sore need of a respite from the pressure of end-of-the-course classes, but it’s also true that I have a lot of ideas to try and share sitting on the drafts shelf of my mind. Little by little they will see the light.

My students struggle with English spelling. Who doesn’t? Little by little I can see they’re making progress, but unfortunately there are some spelling mistakes that I keep finding in my student’s exams. A quick search on the Internet reveals that the occurrence of these spelling mistakes has little to do with your mother tongue though, admittedly, the quiz is based on my students’ spelling mistakes who are, for the most part, Spanish.

What about you? Do you also make these mistakes? Let’s find out!


Some orthodox and unorthodox techniques to get rid of these spelling mistakes


  1. Write them down. This is the dull, traditional but effective way of correcting spelling mistakes. Start with one mistake and write it down, at least 10 times. This was my mother’s favourite method. I guess it served two purposes: to help us learn the correct spelling and also to keep us quiet for a while. I can’t blame her. I have 4 siblings and there are 6 years between the youngest and the oldest.
  2. Do the quiz. Do it once and write down all the targeted words you can remember. Take the quiz again. Correct the ones you misspelled. Repeat procedure.
  3. Ask someone to help you. Write a list of the words you have trouble spelling. Write the translation in your own language next to each one. Ask someone in your family to call any of these words at random. Write them down and ask this person to correct them. Once you have mastered the spelling of the words, you might want to buy your helper a drink. He deserves it.
  4. Write a short story. Write the words you seem unable to spell correctly. Make sure you write them down properly. Read them several times. Write a short story containing them and give yourself a high five if you got most of them right. Warning: don’t ask anybody to read it. The story will probably not make any sense at all.
  5. Stick on the walls of your house flashcards with the correct spelling. I used to do it with phrasal verbs when I was at uni. It worked but my flatmates were not very happy.
  6. Use Quizlet or any other app to create flashcards. This app is great to work with spelling as it offers a variety of games to practise the correct spelling. I’ve made a short video tutorial. See it below.

Blog de Cristina is also on Facebook. Follow us

Photo via Visual hunt

A little Experiment: Hitting the Intermediate Plateau? No, you’re not.

Do your students sometimes feel as if they are not making enough progress? Do they sometimes have the impression their language learning has slowed? Do they feel they are stuck in the intermediate plateau?

While this feeling is completely normal, it can sometimes be very frustrating for our students. You might try to explain to them that this is just part of the natural process of learning a language, but the truth is that in their eyes, they are just not progressing as fast as they think they should, no matter how hard they try. It’s true that this perception is not real, but it never hurts to show them how unreal it is.

Today I want to share with you a little experiment I did with my students. Very simple, but very effective too. I did with my intermediate students, but you can easily try it with students of any level.

What’s the aim of the experiment?

to make students aware of how much they have learned at the end of a topic-based lesson. The idea is to brainstorm vocabulary related to the topic twice: at the very beginning and at the very end of the lesson(s) to make them realize how much they learn in the course of a single lesson. Making students aware of how much they are learning can dramatically improve teaching effectiveness as it is a powerful way to boost their motivation.

How long does it take?

5 minutes at the very beginning of the lesson and five more at the end of it. If you dedicate two or more sessions, 5 minutes at the beginning of the first session and 5 minutes at the end  of the last one.

Do you need to use technology?

I am afraid you do. For this experiment, students need to use their mobile phones with internet connection or any other device with internet connection. The good news is that you just need one device every three or four students. I have also used  Answergarden, which is a very simple free tool used for getting real time feedback from a group. It’s really very easy to use, but if you think you need extra help, you can watch a video tutorial in Teachertrainingvideos.com or read a brief tutorial here.


THE EXPERIMENT


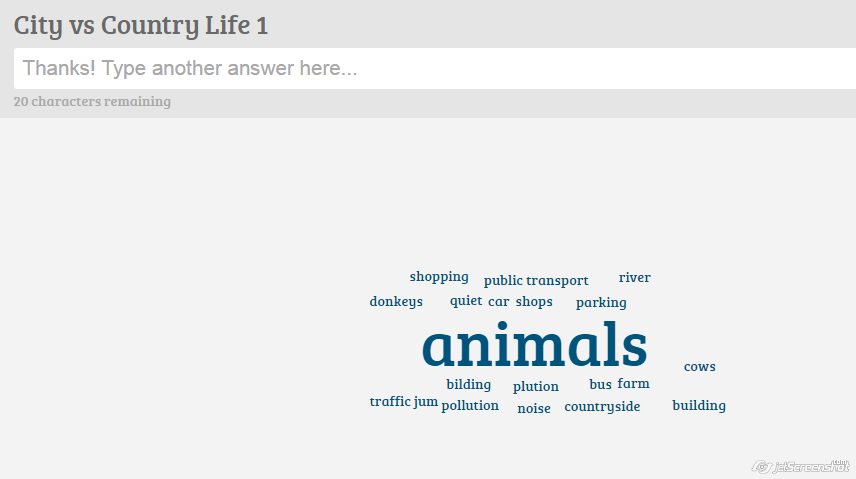
  • Go to Answergarden and create a New Answergarden (it literally takes less than one minute). In my case, I created an Answergarden with the title City Life vs Country Life as this was the topic we were about to study in class.
  • Ask students to work in pairs or in groups of three and use just one mobile phone.
  • Share the link with your students and ask them to type the url in their devices (as I have mentioned, my students used their mobile phones) You can use Google shortener to shorten the link.
  • Ask students to brainstorm vocabulary related to “living in the city and living in the countryside”, enter the  vocabulary in the box and carefully check the spelling before submitting their answers. Allow 2 or 3 minutes.
  • Display on the overhead projector the answergarden. As students submit answers, click the Refresh tab on the bottom menu to update the answer display.

(below you can see the first wordcloud)

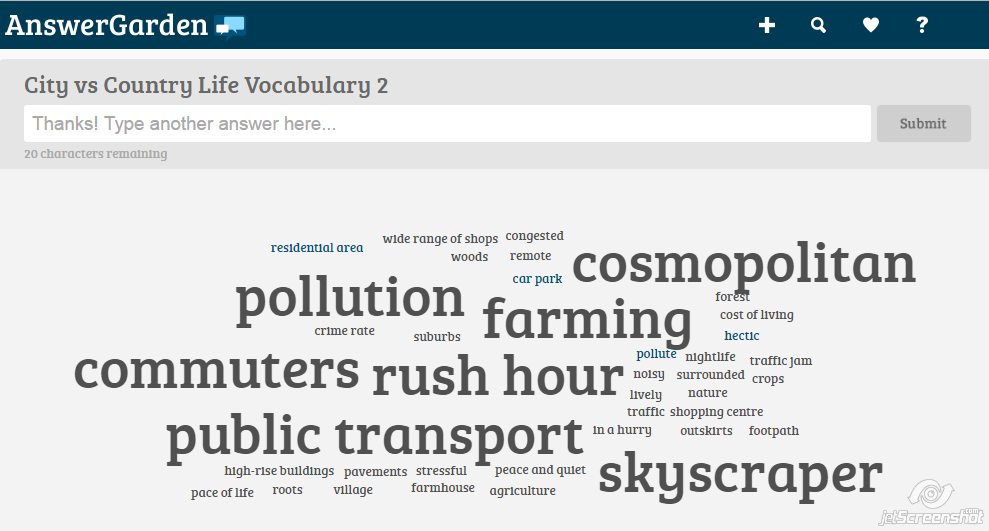
  • Go through the vocabulary they have submitted and make sure you save this first word cloud.
  • Teach vocabulary as any other ordinary day
  • Repeat procedure at the end of the lesson or the sessions dedicated to this topic.

  • Display both clouds and ask students to compare them and reflect on how much they have learned on the course of a single lesson. Contrasting both word clouds will undoubtedly not only motivate your students, but also will reinforce the idea of progress that is sometimes lost especially at the intermediate level.

Another idea with the same aim would be to ask students, at the end of a unit, to write everything they have learned in this unir. They’ll be just amazed at how much progres they have made.


2 Superb Activities with Posters to Review Topics before Oral Exams

I love working with posters and these two activities combine some of the elements that guarantee a successful lesson: movement, interaction, visuals and fun.

It is great if you need to revise a number of topics before an oral exam.


ACTIVITY ONE: 

Aim:  to revise several conversation topics integrating grammar, speaking and writing.

Level: B1 (intermediate and above)

Time: 50 minutes or more

Materials: post-it notes (alternatively, you can use pieces of paper+ Sellotape/blu-tack). I have used the free website Canva to create my posters. You can see them here. I have used the free website wheeldecide to create a wheel for the wh-words. (short video tutorial here)

Task. In this engaging activity students will need to work in pairs or small groups and provide the questions which will be later answered in groups about a certain topic.

Preparation:

  • Create as many posters as topics you want to revise and display them on the walls on the class. See mine above. You can also do this activity without posters by writing the different topics on pieces of paper, although obviously this is less appealing. Ideally, the topics should be written big enough to be seen from the back of the class.
  • Create a wheel containing wh- words and a yes/no question option. See mine below. If you don’t want to use a wheel, you can write the wh- words on pieces of paper and put them in a box.

In class

This activity is divided into two stages

Stage 1.

  • Direct students’ attention to the walls of the class and read the different topics to be revised.
  • Ask students to work in pairs or small groups.
  • Spin the wheel. Students in their groups choose a topic  from the ones displayed on the walls and write a question about it beginning with the wh- displayed on the wheel. Give students sticky notes and ask them to write their question there, and then stick it next to the poster it refers to.

For example: the wheel displays How?. Group A decides to write a question about City life and Country Life. They might write something like: How are city people and country people different?

  • Spin the wheel again and repeat procedure as many times as you want. Each time students will need to choose a different topic.

Stage 2

  • Ask the groups to stand up and stand next to a topic. Students read the questions on the sticky notes and discuss them. Encourage the use of specific vocabulary.
  • After five minutes, ask the groups to rotate to the next topic.


ACTIVITY TWO: 

Aim:  to revise several conversation topics .

Level: B1 (intermediate and above)

Time: 30 minutes or more

Materials:  I have used the free website Canva to create my posters. You can see them here

Task. In this fun activity students will alternate playing the roles of interviewer and interviewee while reviewing different topics before taking an oral exam.

Preparation:

For this review activity you’ll need to create posters on different topics and write two or three topic-related questions to be used in the interview.

In class

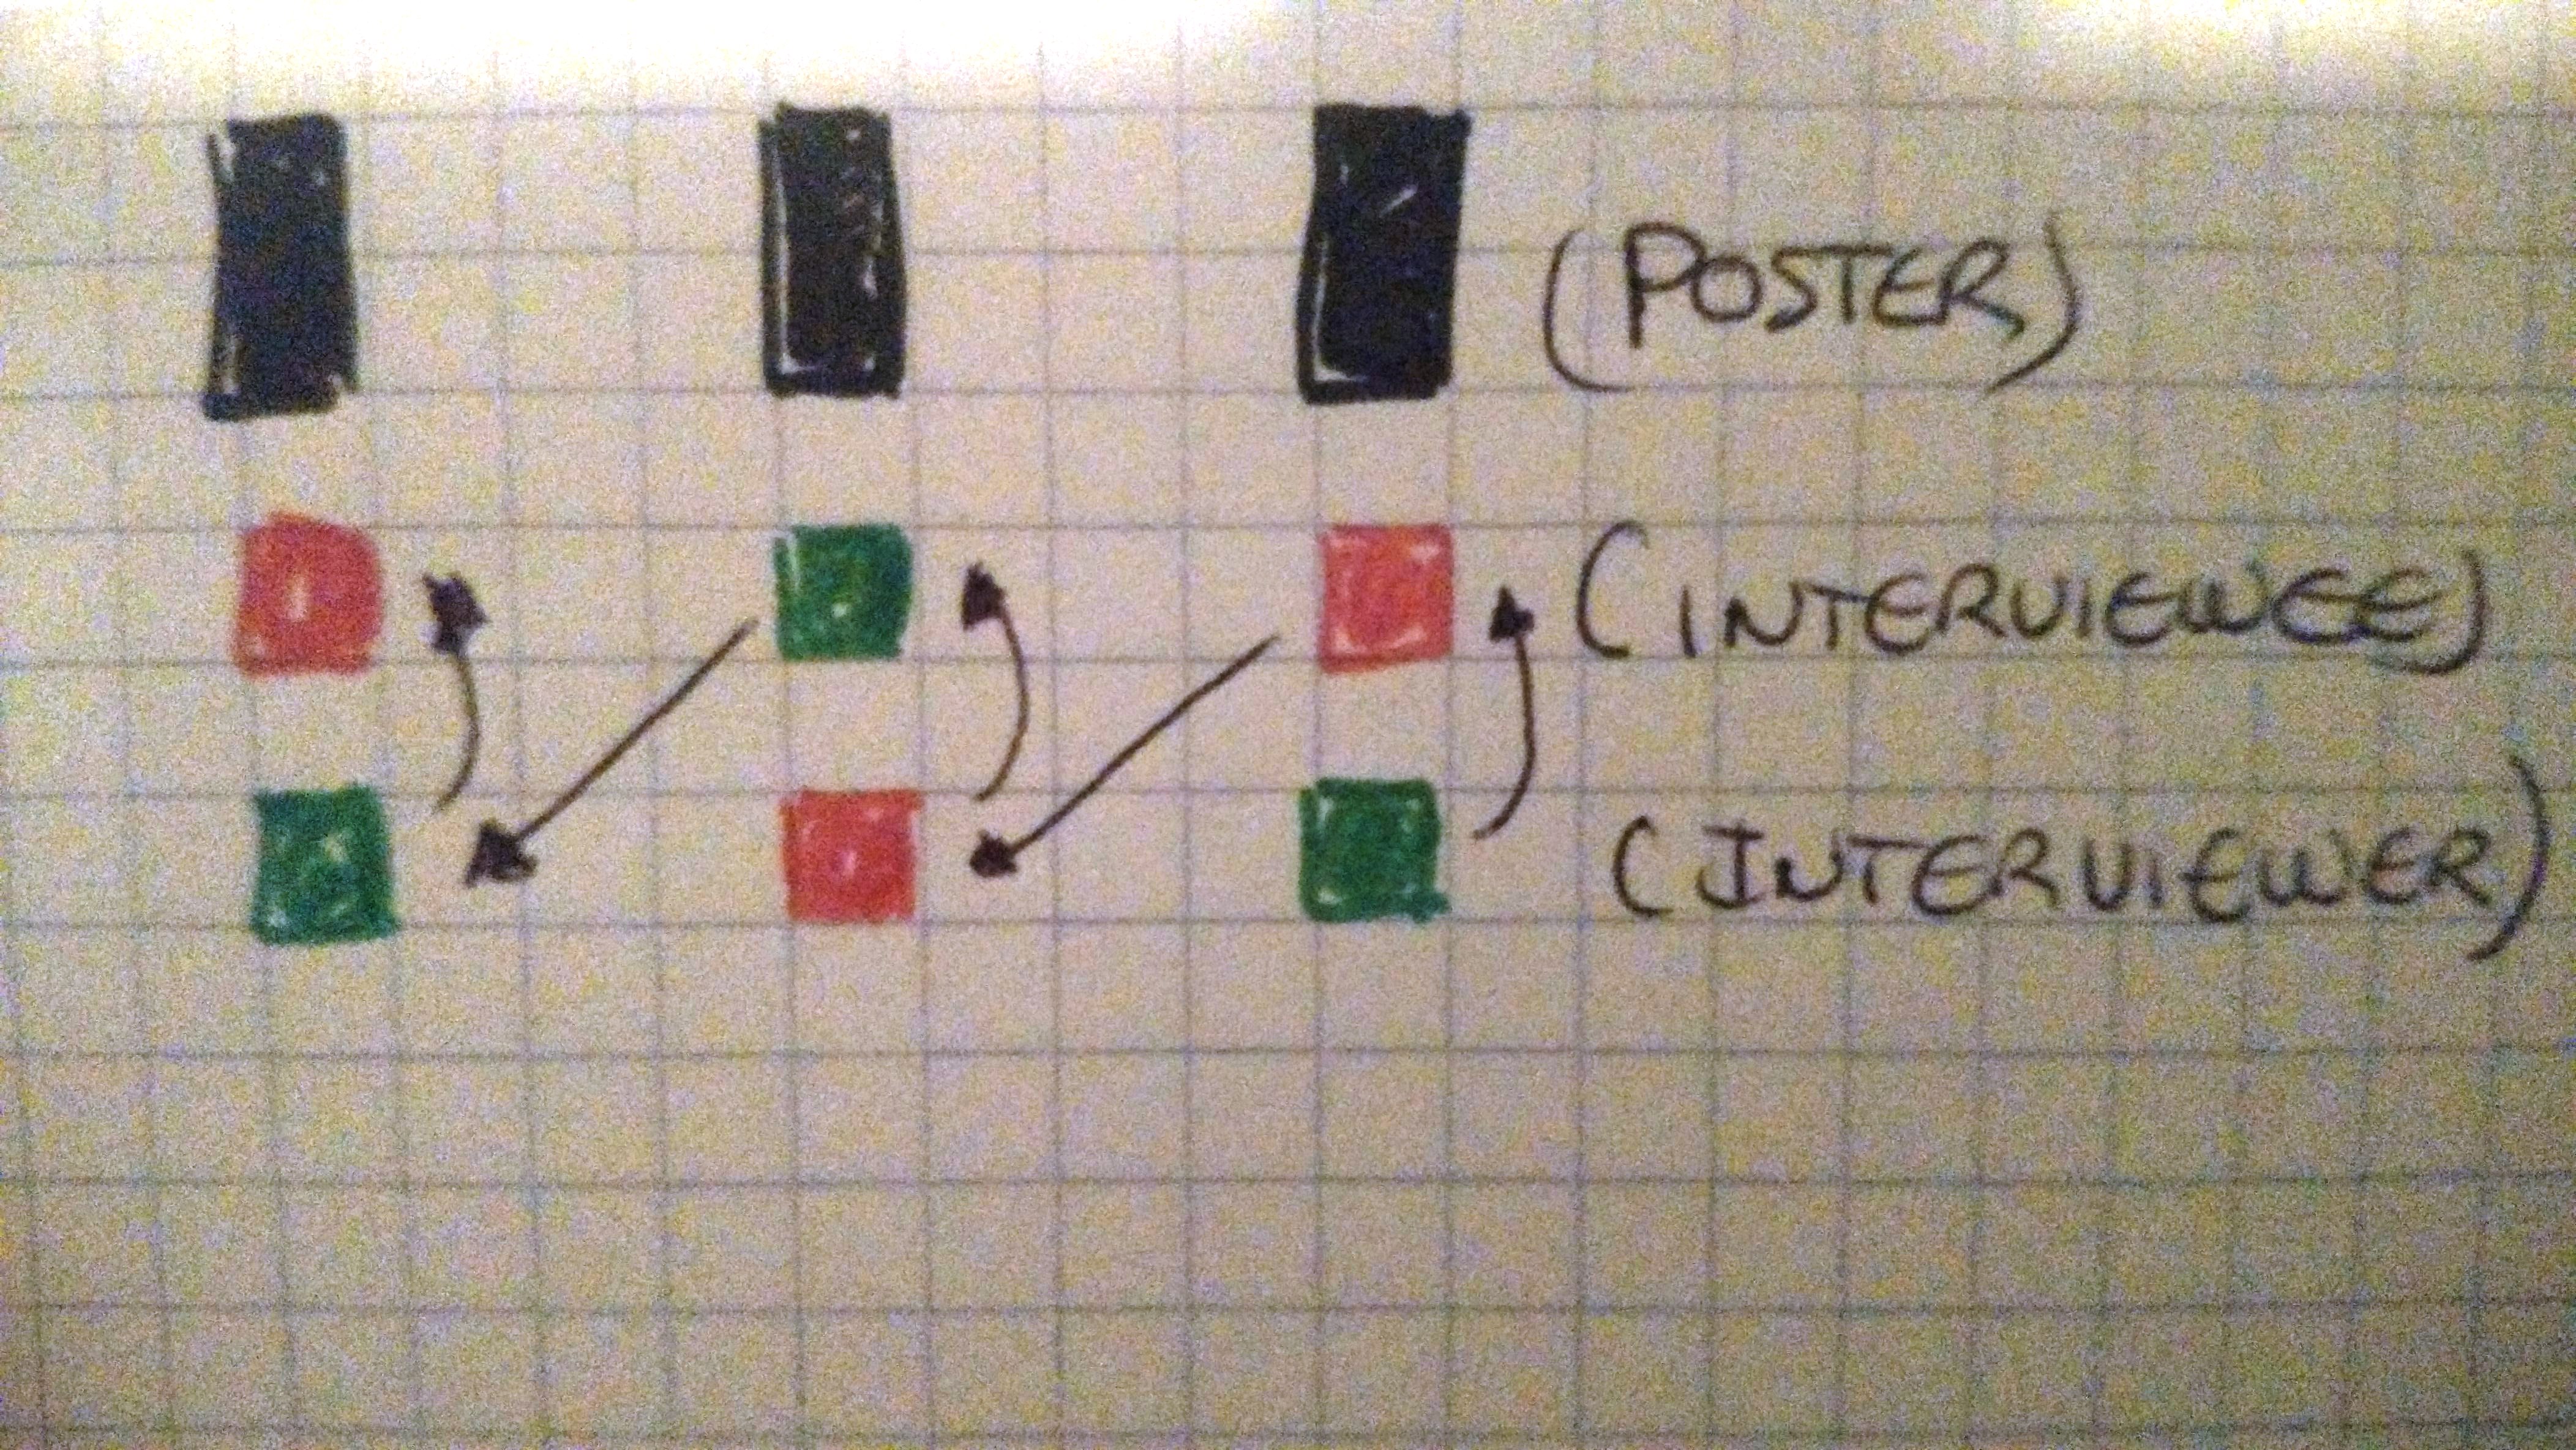
Ask as many students as posters you have displayed on the walls of the class to stand up and stand next to a poster. One student, one poster. Let’s call them Student A. They are now the interviewees. There should be, at least, the same number of students sitting down. Let’s call them Student B. They are the interviewers.

Ask Student B to stand up and choose a student A to interview using the questions on the poster. Encourage Student A to elaborate on the answers. Allow 3-4 minutes.

Ask student B, i.e. the interviewer, to exchange places with Student A and become the interviewee and ask student A to rotate to the next topic and become the interviewer.

In this way, students alternate being the interviewer and interviewee while revising a variety of topics in a dynamic way.

Repeat procedure until all the topics have been covered.

(Note: this activity can also be done if you need to have two Students B in one station. They’ll just have to take the role of interviewer twice before becoming an interviewee.

Hope you enjoy the activities!

Blog de Cristina is on Facebook too. Don’t miss any posts.