Tag Archives: students

The Article in English: Explanation, Exercises and a Challenging Quiz

Although the use of the article in English seems a priori an easy subject to teach, the truth is that some students struggle with the use and omission of it.

What can you find in this post?

  • Intermediate level:
  1. Animated video with some rules on the use and omission of the articles “the, a/an”
  2. Some links to exercises from around the web to consolidate knowledge.
  • Advanced Level:
  1. An engaging quiz with feedback notes featuring some difficult cases related to the use and omission of articles.


Grammar. Watch the presentation. Pause it as often as necessary to understand and assimilate the rules.

Exercises: Links to interactive exercises  from around the web to consolidate knowledge.


The quiz


A Project-Based Learning Activity: Unusual Traditions

These past few days have been hectic with lots of exams to be written and then marked, plus all that red tape I can’t stand involving end-of-term exams. To top it all, my old friend the flu decided to pay me a visit. Very timely.  Right now, thank goodness, deadlines have been met and everybody seems to be winding down for the holiday season. Me, too. So, that’s probably going to be the last blog post of the year.


  • Organisation: Group work
  • Level: B2 and upwards
  • Materials: tackk tutorial here (optional)
  • Aims: to encourage collaborative work by giving students the challenge of researching, selecting and presenting a project about unusual traditions around the world.
  • Online tools: Padlet and Tackk

Project Based Learning- What is it?

It is a student –centred teaching method in which students acquire knowledge and skills by investigating and responding to a complex question, problem or challenge.

PBL is an active learning style which inspires and motivates students because they take an active role in their learning process and experience success in their own learning. The role of the teacher here is of mere facilitator and coach.

In PBL students are encouraged to work in pairs or in groups, which is also good because it creates a friendly atmosphere which is a boost to their motivation and creativity.


Project-based learning structure

  1. Choosing the problem or challenge
  2. Organisation
  3. Brainstorming
  4. Coordinating
  5. Sharing learning and refining
  6. Presenting and sharing

1.Choosing the problem or challenge.

For this project, students will be rising to the challenge of presenting information about unusual customs in the world.

2. Organisation.

My classes are quite large so students will work in groups of 4 or 5.

On the board the class as a whole decide on 4 or 5 areas, they want to talk about. There should be the same number of areas as groups you have. Each of these areas is assigned to a group to research.

In this project

  • Relationships
  • Festivals
  • Law
  • House and Home
3. Brainstorming

This step is done entirely at home with the help of an online collaborative free tool. My students are adults, some as old as 70,  and they only see each other in class  twice a week, so it was important to provide them with some kind of free online tool  they could use to brainstorm ideas, share them with the members of the group and organize their project (timing, visuals, specific assignments..etc). I used a Padlet, a well-known collaborative tool, which is very easy to use, something really important as some adults are reluctant to use new technologies. Each group was assigned a different Padlet and given a week to do research on the internet and post on Padlet their ideas.

Below is the Padlet the group”House and Home” used.

Hecho con Padlet


4. Coordinating.

This stage might take the first or last 10 minutes of your lesson. Once they have shared their ideas on Padlet, in class they decide on the number of traditions they are going to present, who is going to do what, the order in which they are going to present the information and the visuals or videos they are going to use.

5. Sharing learning and refining

In the next class, allow students time to get together in their groups and share their drafts. Offer help and guidance but ask students to help each other by swapping their drafts within their group  to improve and proofread their written work.

6. Presenting and sharing

Agree with the students on the order of the groups and let the show begin. Below is a picture of one of the groups on stage.

Sharing it with the world is also important. Here’s how we did it. Again, we used a free online digital tool called Tackk.com, which allows  you to beautifully showcase your projects. I gave my students this simple tutorial to help them get familiar with the tool.

Here’s the tackk my students have created.


Collaborative Writing Activity: Writing an Article

Do we really dedicate enough time to writing activities? Or is it something we keep putting off because it consumes precious time we feel we can’t afford to lose?

Most of my students think that writing is boring. I haven’t asked them. But do I need to?

Let’s face it! It can be boring. Ok. I might agree.  But most of my students, at the end of the course,  will have to sit external exams containing writing tasks. So yes, writing might be boring, but necessary.

Lately, I have been designing activities to make my students change their minds about the whole process of writing . My far-fetched aim when shaping these activities is that my students leave the class with a smile on their face, even after spending a whole session writing.

With this in mind I have created this activity, which can easily be adapted to any kind of essay, where students will need to follow several steps to create a final product: an article for the school newspaper.

Level: B2 and upward.
Aim: to collaboratively write an article in class.
Materials: the writing process handout, checklist, a model article, PDF of the activity
Time: 50 minutes
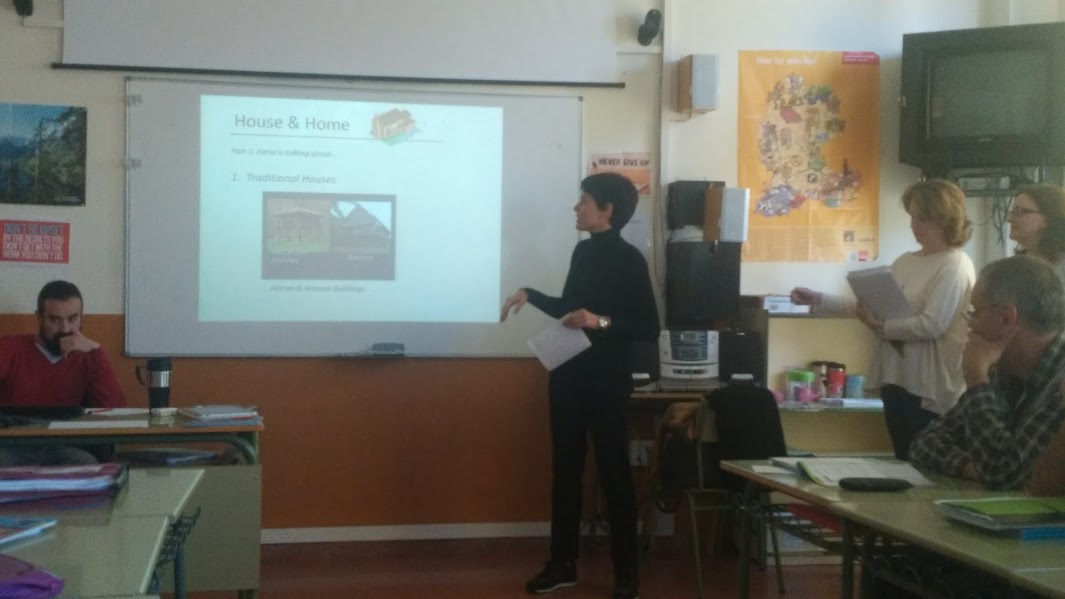
Note: this task is to be done after explaining the Writing Process, the parts of an essay and the tips to raise their essay score (handout above).Students will need to refer to this handout. Students will also have read a model article, which can be found in most textbooks.


INTRODUCTION. What’s an article?


An article is usually written for a magazine or newspaper. The main purpose is to engage the reader, so the opening paragraph should catch your reader’s interest. Attracting the reader’s attention can be done in a number of ways (refer to handout “The writing process “Part 2).

An article is usually factual and includes some comment, recommendation or opinion. It can be formal or informal depending on the target audience. Remind them, this is academic writing, so they cannot use contractions, abbreviations, or colloquial language.

An article consists of the following parts:
• Opening. It is the general presentation of the topic.

• Body (two or more paragraphs). The first paragraph should contain the strongest argument or example. The second paragraph the second strongest argument and the third the weakest.

A paragraph consists of several sentences about a certain topic. It has the following parts:
o A topic sentence, i.e. an idea.
o One or several supporting sentences to expand on the idea.
o A concluding sentence.

Conclusion. It is the paragraph that summarizes the main idea or presents a conclusion, depending on the kind of essay you need to write. Some things to bear in mind:

o It should not bring new ideas.
o It shouldn’t be very long.
o It can be similar to the opening, but presented in different words.

PROCEDURE


Step 1. Getting Started


• Ideally students work in groups of three. If necessary, ask them to work in pairs trying not to pair two weak students together.

• Suggest the following topics to write about and ask groups to choose one. Topics can be repeated.

1. Family reunions
2. Life lessons learned
3. Moving to another city


Step 2. Writing a Draft


Organisation:

1. Writing the Opening.

In this part, students introduce the subject.
The whole group works on the opening paragraph. Remind them of the three ways to catch the reader’s attention. Refer to Part 2 of “The Writing Process” handout.
Useful language:
Can you imagine…? Have you ever…? Would you like to…? Did you know that…?

2. Writing the Body

In this part, students give facts and details about the subject.
1. The whole group brainstorms for ideas. Refer back to handout the Writing Process to see how to do it effectively.

2. Students choose an idea to use in their paragraphs, and expand it, as explained in the Writing Process handout. One idea= one paragraph= one student. If you have a group of three students, they’ll need to write a body with three paragraphs. If there are only two students, two paragraphs.

3. Students, individually, write their paragraph developing their idea. Remind them to go from “general to specific”.


Step 3. Proofread your draft.


The whole group proofreads and improves their essays making sure the ideas flow naturally and the right connectors are used. Ask them to use the checklist provided.


Step 4. Writing the Conclusion


In this part, students sum up the main points and possibly give an opinion or recommendation.
1. The whole group works on the Concluding paragraph.
Useful language: In my opinion…, in conclusion…. As I see it…, Why not give t a chance..? Why not try it…?

2. The whole group proofreads the essay. Ask them to read it aloud, circling anything that needs to be improved, corrected or clarified. Does it sound “right”? Then, it’s ready.


Step 5. Writing your final essay.


Ask students to write their essays neatly on a clean sheet of paper (I used a different coloured paper for each group.) Display them on the walls of the class and ask students to stand up and read their partners’ articles.

And, of course, you’ll need to take them home to correct errors and offer advice.


On the other hand, I’ve been experimenting with Tackk, and embedded below is an example of some of the things you can do with this tool. But what I found more interesting, and will need to explore further, is the possibility of using this tool as a collaborative tool.  I’ll try to use it soon and tell you how it works.

Thanks for reading!

Blog de Cristina is also on Facebook. Join us!


Walk, Talk and Give Opinion

Is there anything that students love more than walking around the classroom while talking to their classmates? I doubt it!

One of the most effective techniques to keep students engaged is probably varying the dynamics in the classroom. It’s true that some tasks require that students work alone, but working in pairs or in small groups is always a good alternative and if you add movement to the activity, then you can almost guarantee success. What is more, varying the dynamics during the course of your lessons helps to reduce the weariness that sets in when students are asked to sit two-hour lessons, which are the ones I teach.

The activity I am going to share with you today is a very simple one where students will need to work in small groups and move around the classroom discussing some controversial statements. It is highly adaptable to any topic. In this example, I am revising food- related vocabulary with intermediate students. This discussion technique allows students to be actively engaged as they walk around the class.

  • Level: intermediate to advanced
  • Time: one hour
  • Language point: Expressing opinion. Agreeing and disagreeing
  • Organisation: Small groups of 3 or 4 students
  • Materials: Posters containing controversial statements (see mine here). Handout with target language. PDF here
  • Aims: To teach how to express opinion and how to support or contradict other people’s opinions through the discussion of some controversial food-related statements.

PROCEDURE

Before the class

Write some controversial statements you want your students to discuss about the current topic of study. Write each one on a slip of paper or print some photos and add the text to the picture- I have used picfont. Stick them on the walls of the class. For more advanced classes you can choose random polemical statements. I would suggest that you avoid statements that might lead to embarrassment or offence.

Teach how to give opinion

Give students the handout with the target language and ask a student to read it out, clarifying meanings and focusing on pronunciation and intonation.Ask them to choose 3 or 4 expressions from each column; the ones they feel most comfortable using.

Group students.

Ask students to work in small groups of three or four students depending on the size of the class and direct students’ attention to the walls of the class, where the statements will be displayed.

Begin

Ask students to stand up. Each group should start at a different statement where they will discuss their opinions and agree or disagree accordingly. Remind them to use the expressions they have underlined, either to give opinion or to agree/disagree with someone’s opinion.

Help

While the students are talking, walk around the class offering help and guidanc

Rotate.

After six to eight minutes, ask the groups to rotate to the next statement. Repeat until all the groups have talked about all the statements

Share

Ask students to sit down and choose a statement to discuss as a whole class.

Below, some of my students doing the task.

Getting-to-know-you Bingo with a Fun Twist

I can’t believe summer is coming to an end and well, here we are again. Another school year is about to begin and once again, as every year for the past 25, butterflies are beginning to gather in my stomach. It’s a nice sensation and one I welcome ‘cause it means that even after 26 years dedicated to teaching English I still feel like a newbie aiming to impress my students.

Now, be honest! Wouldn’t it be nice to start the course with a fun activity? A getting-to-know-your-classmates activity after which, students leave the class with a smile on their face and chatting animatedly with their peers?

This is the aim of this fun human bingo ice breaker designed to get students talking to each other about themselves while having a nice laugh.

The game is easy to customize, so feel free to edit the cards to include or exclude prompts

  • Materials: bingo cards, pens or pencils and a small object to grab: for example, a rubber.
  • Optional online tool:  Osric
  • Time: about 30 minutes
  • Level: A2 and above

BEFORE THE CLASS

  • Prepare 25 prompts for the students to talk about
  • Prepare a Bingo card (5x5grid) for each student with the prompts (see mine below).

There are lots of bingo card generators online which will randomly generate as many cards as you wish once you provide the desired input. Osric is the one I used for this activity.

  • Cut up all the 25 different prompts and put them inside a bag or a box.

PROCEDURE:

  1. Explain that they are going to play a human bingo to get to know each other. To win the game they will need to mark off the prompts on their cards as they are drawn randomly by a caller. The winner will be the first person to mark off five squares in a vertical or horizontal row.
  2. Give each student a Bingo card and a pen/pencil. Allow them one minute to read the 25 prompts on their bingo cards and decide on their strategy.
  3. Explain that although this is a whole-class activity, students will be playing in pairs and they will need to sit together or put their desks together.
  4. Ask each pair to place a rubber (or any other small object ) on the table. Explain that to win the game they will only need a bit of luck and quick hands.

How do you get to mark off your square?

Tell them that you’ll draw a prompt from the bag and read it out. Students listen and if it is true for them, they quickly pick the rubber on the table. Only the student who has the rubber will get the chance to mark off the square. To do so, they will need to talk about the prompt  for one minute or do as the prompt says.

Who wins the game?

The first student to fill five squares across or down shouts BINGO! and the game is over.

The winning card is checked to make sure the student has not made a mistake

Rounding off the activity. Check that the winner has marked correctly all the squares by asking him to read the cards he has marked on the winning row. Ask him to talk about one of the things in the card and then choosing another prompt, challenge another student to talk about it for one minute.

 These are the prompts I have used

  1. Is an only child
  2. Was born in another country
  3. Speaks 3 languages
  4. Has lived in another city
  5. Can sing a song in English
  6. Can cook
  7. Plays a musical instrument
  8. Has a sports trophy
  9. Has a tattoo
  10. Has a dog
  11. Has done sth cool this summer
  12. Belongs to a sports club
  13. Has a celebrity autograph
  14. Prefers books to ebooks
  15. Has been in three continents
  16. Has had a big argument with a friend
  17. Doesn’t like English
  18. Can tell a joke in English
  19. Has been on holiday recently
  20. Can pronounce 13 and 30
  21. Knows how to pronounce “bear” and “beer”
  22. Knows how to say “gallina” in English
  23. Knows how to say 345,768
  24. Has slept in a tent
  25. Can write the past/past part of “to fly”

Blog de Cristina is also on Facebook. Follow us!