Tag Archives: video

An Outdoors QR-Codes Listening and Speaking lesson about Cities

I need to share this activity. It really has all the ingredients for a perfect lesson.

Things I want you to know about this lesson.

  • It is super engaging and gives your class a touch of modernity
  • It is collaborative
  • It deals with two basic skills, listening and speaking, but a lot of subskills are also at work.
  • It gives students and teachers a good excuse to stand up from their seats and even take the lesson outside, as I did.
  • It helps build rapport in the class, which is sooo important at the beginning of the course

I am not going to lie to you. It needs some initial preparation, but it pays off. Believe me! Besides, I find the whole process of preparing the activity very entertaining. Ok. I know. You don’t have time. The good news is that you can always use mine if you like my choice of cities.

  • Topic: Cities
  • Level: C1
  • Main skills: listening and speaking
  • Time: 50-60 minutes
  • Materials: here
Before the session
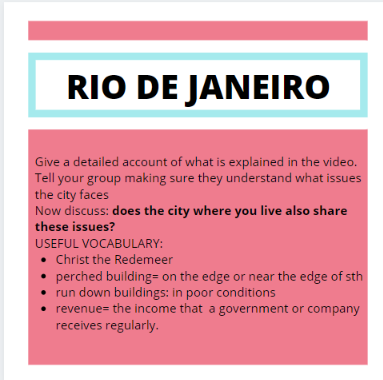
  1. Before the session, look for a video that can easily be divided into parts. In my case, we were learning about cities and their problems so I decided on this one 10 of the most overrated cities from one of my favourite channels on Youtube. I chose only 4 cities to form groups of 4 students.
  2. I used Camtasia to make 4 new videos, one for each city: Rome. London, New York and Río de Janeiro. If you don’t have Camtasia, don’t let this put you off, you can easily use the free online https://online-video-cutter.com/es/.
  3. Once you have the videos, you need to upload them to, for example, Google Drive.
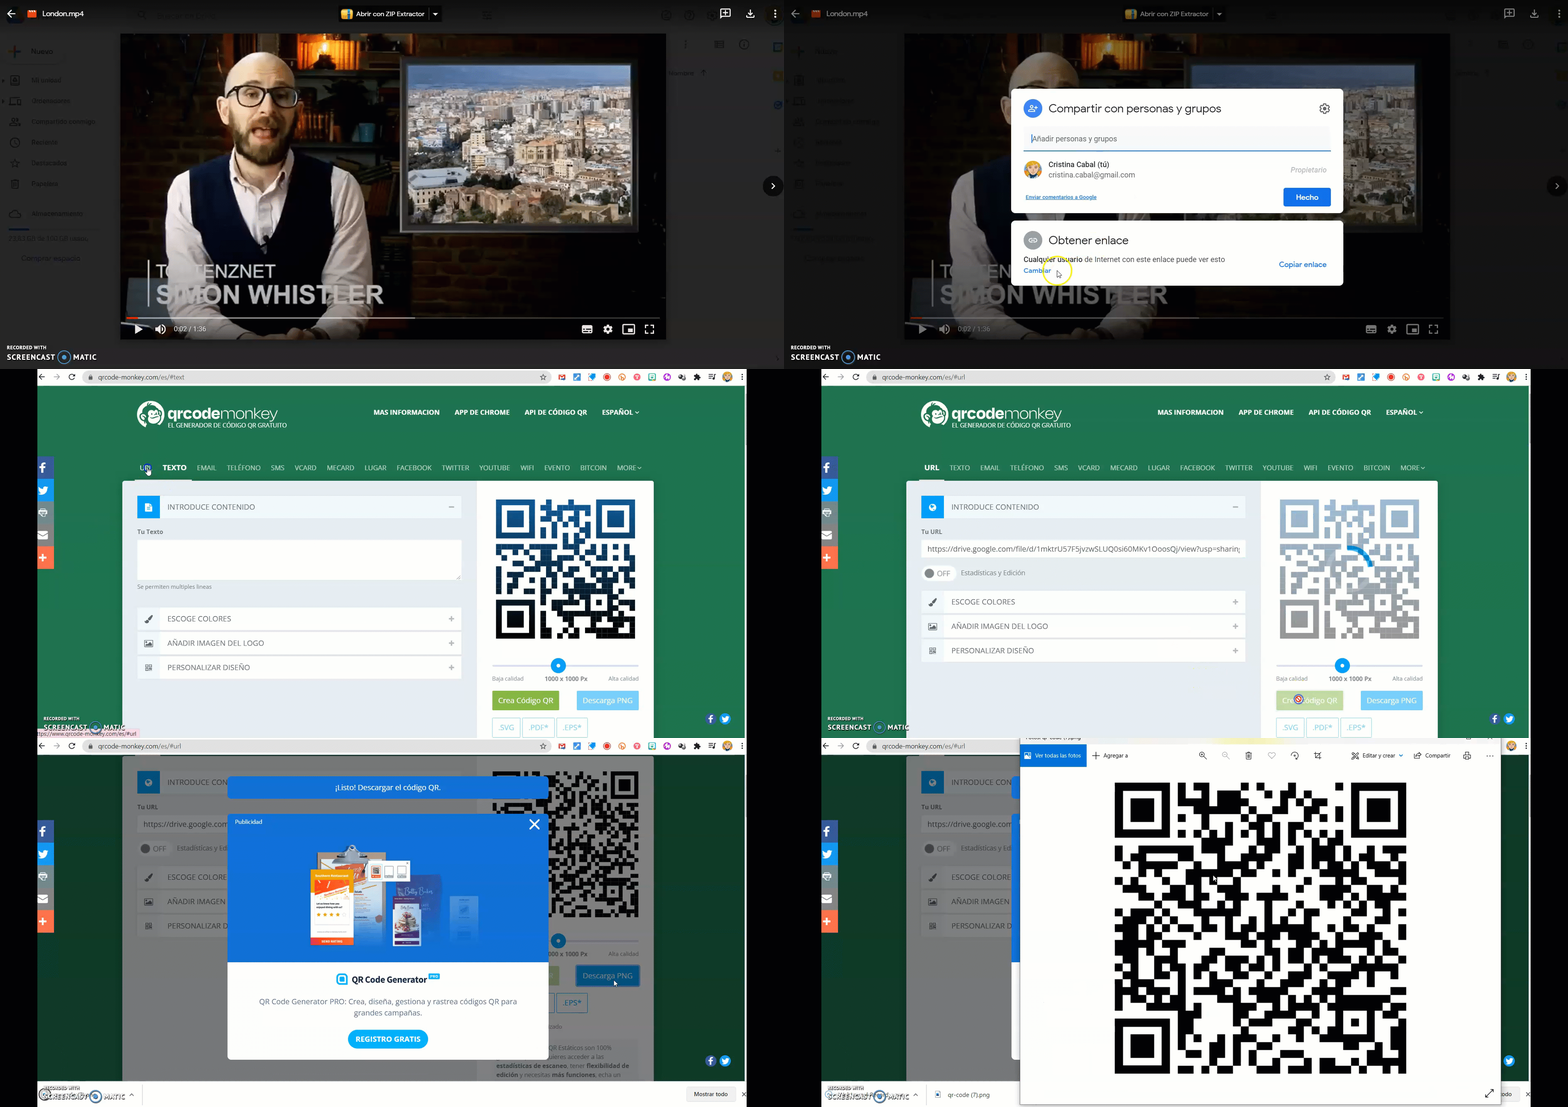
  4. Once online, you need to copy the URL and create a QR Code. I create mine here. The Gif below shows how to do it once the video is uploaded to Google drive.

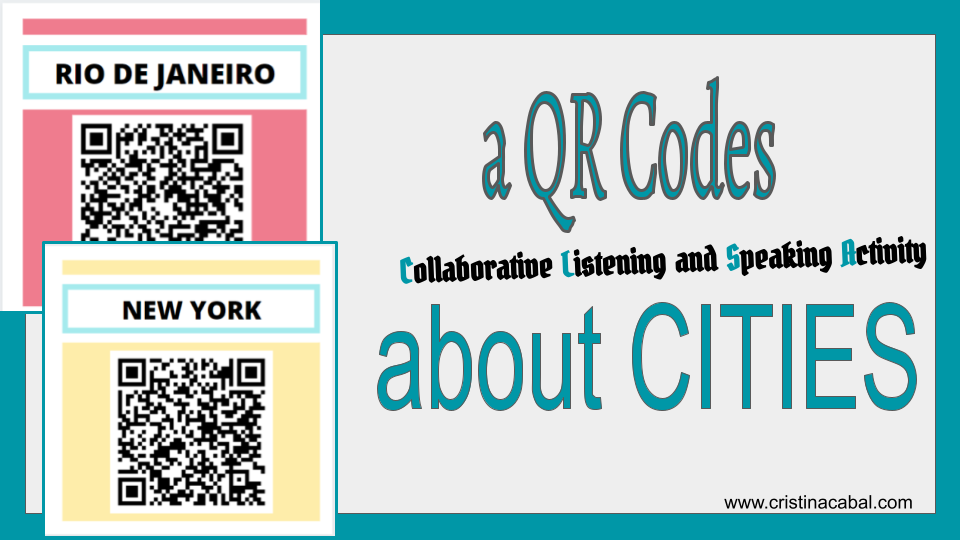
5. Now, you need to print the  4 QR Codes on separate pieces of paper.

6. Before the class, you will also need to tell students to download- I bet they already have it- a QR Code reader (I use QR Scanner) to their mobile phones and bring some earbuds for the next class.

Done!!! See? No big deal!! Now, everything is ready. Ready for the fun part!! 🙄

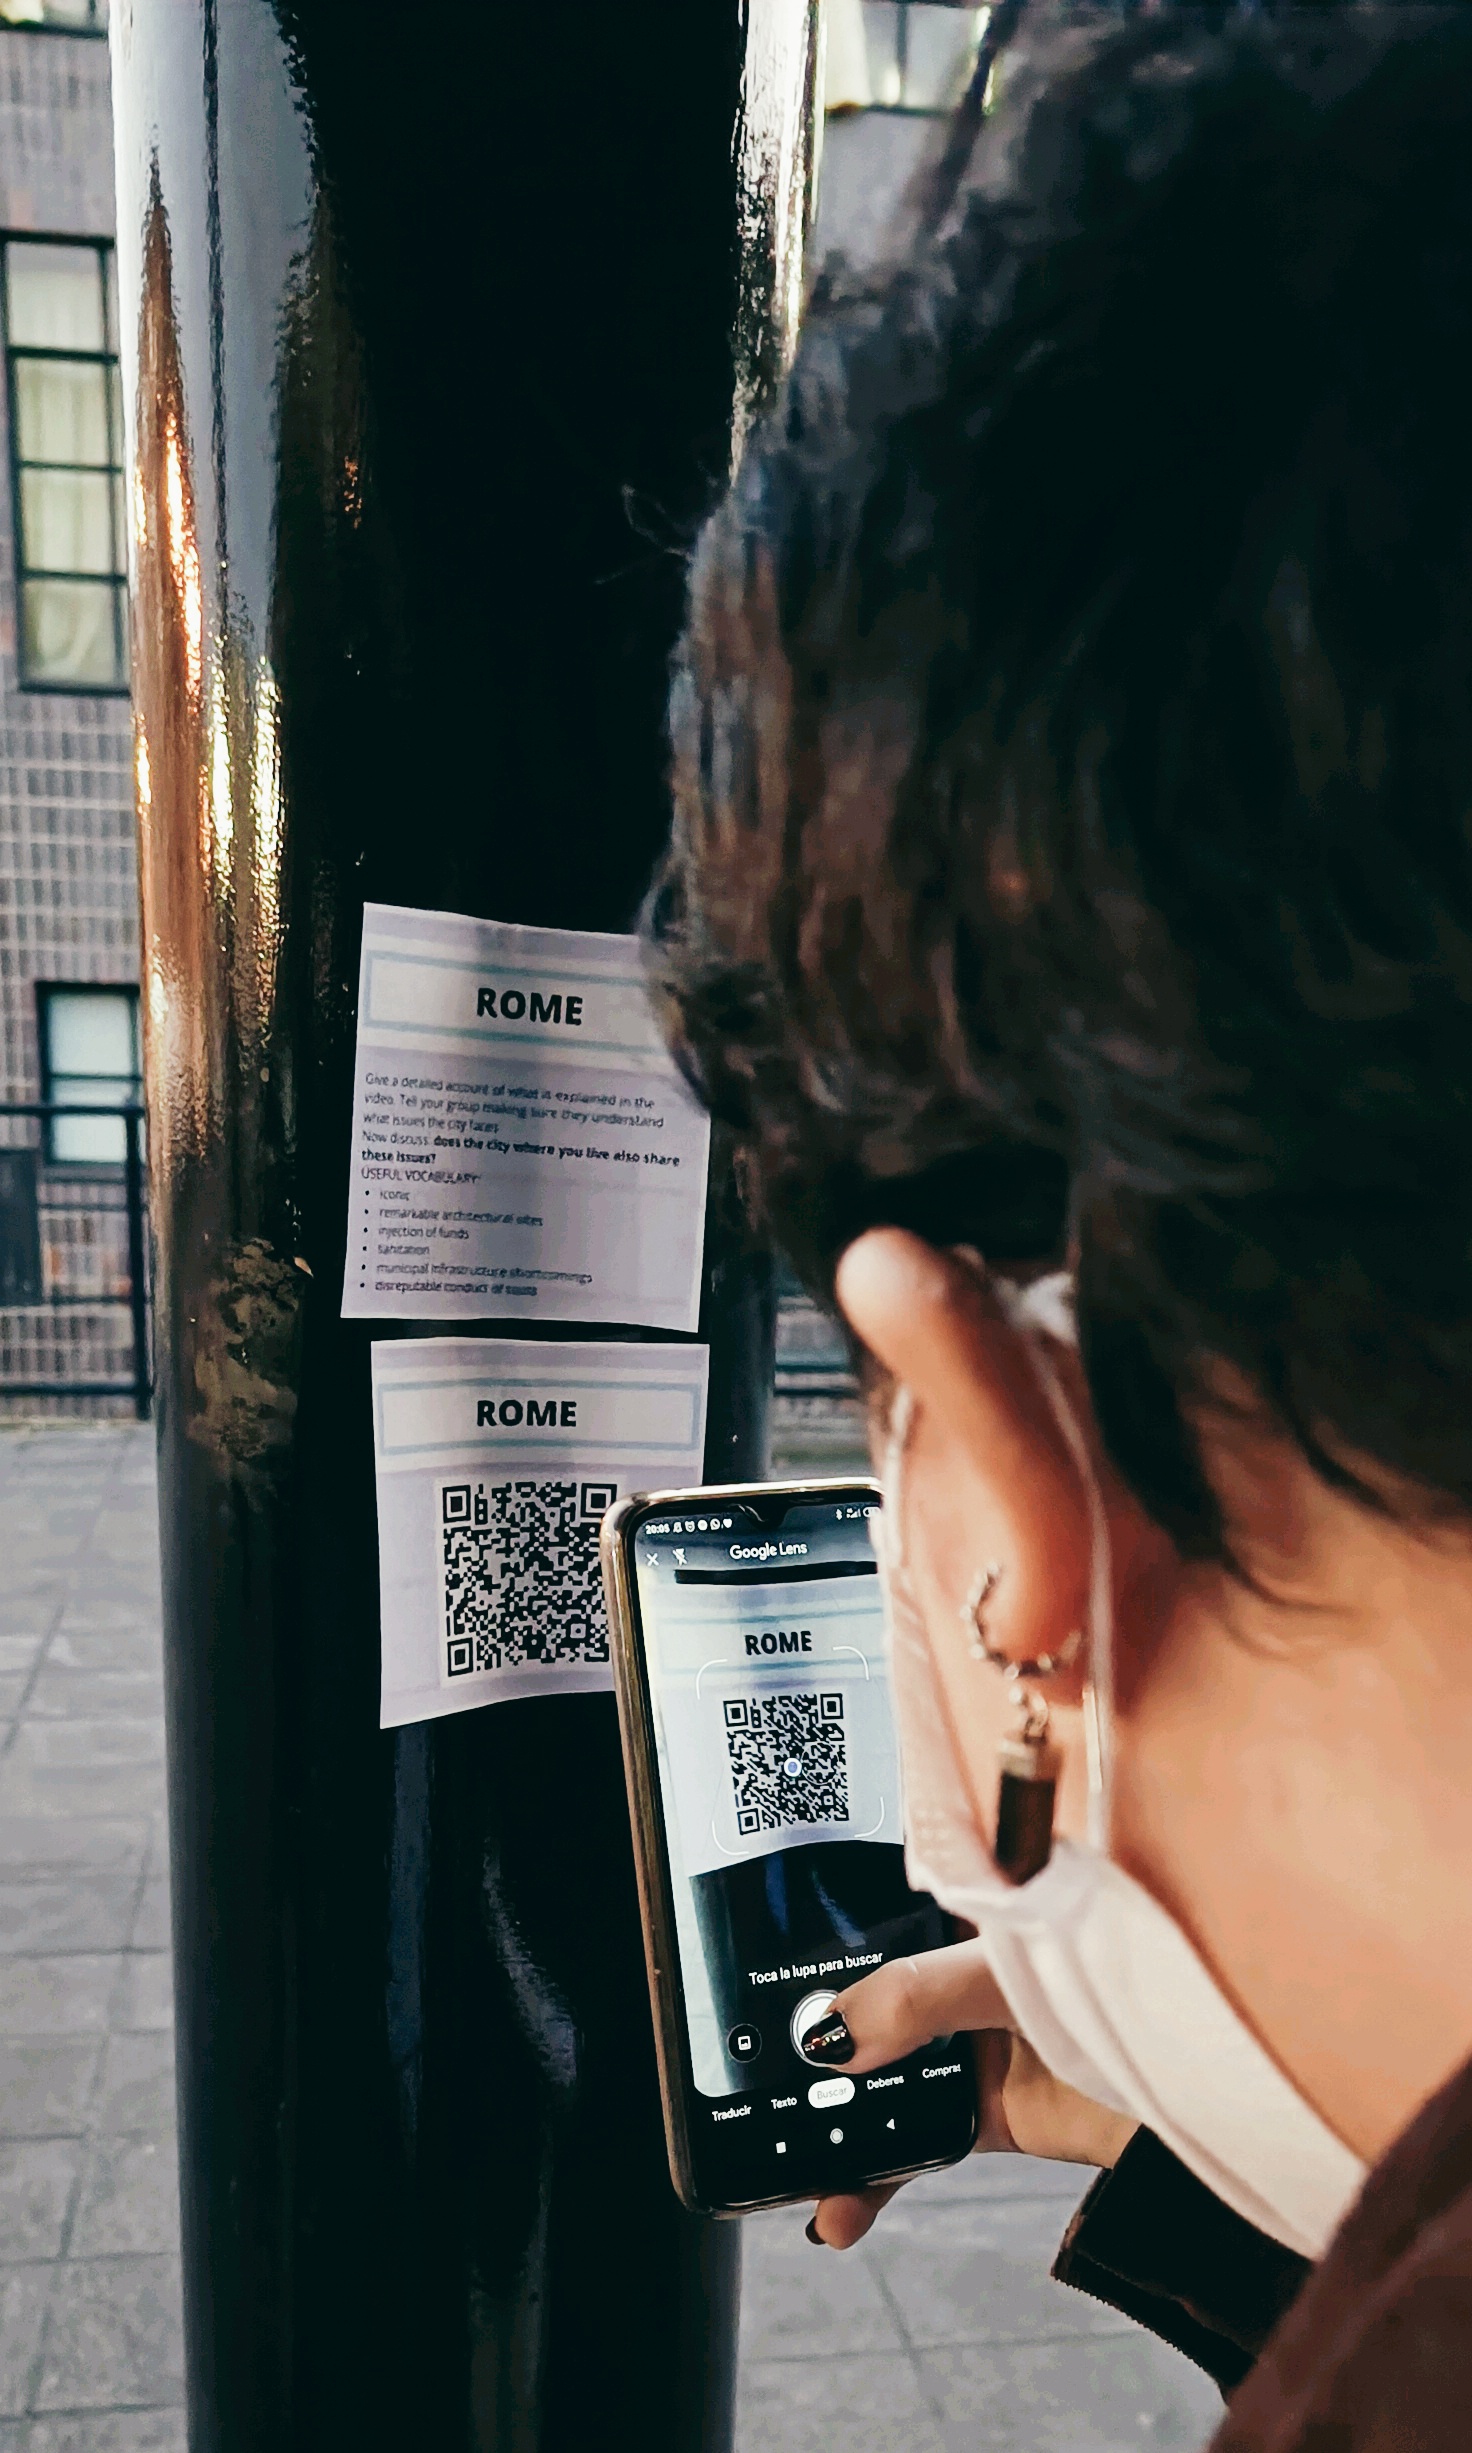
Tell the students this class will be done outside. Yay!! It could be the aisle or any other place on the premises that has enough room for the students to move. In my case, I used the schoolyard and pasted the QR Codes on the walls, well, not exactly walls as you can see from the picture.

Part 1.Listening and  Retelling
  • Ask students to form groups of 4. Each of them should choose a different city
  • Ask students to scan the code for their city and take notes.
  • Explain they will need to share as many details as they can about the city of their choice with their group. Apart from the main specifics of the city, they will need to explain why the city is overrated.
  • Allow 15 minutes for this part as students will need to watch their video several times to write down as many details as possible.
  • Next, students get back to their groups and start sharing the information gathered about their cities.
Part 2:  Speaking. Critical Thinking


In their groups, students talk about the issues the city in their videos has and together they debate whether the city where they live faces these same problems. Ask them to elaborate on their answers and offer possible solutions to tackle the problem.

Hope you have enjoyed my lesson and decide to give it a try!!

Awesome Free Online Video and Image Editing Platform for Language Teachers

Who’s ready for a free online image, video and GIF editing platform?

I have been meaning to write about Kapwing for ages but there is always so much to share that I  kept putting it off. I don’t know why because quite simply, this is my all-time favourite free online multimedia editing suite.

What can you do on Kapwing? The answer would be:  What CAN’T you do on Kapwing?

Let me break it up for you:

VIDEO

Their flagship product is Studio, which an online free video editor: you can add video clips, images, gifs, text, filters, you can trim the video and add a progress bar…etc. Basically a video editor, but simple, online and free.

But what is awesome for us, language teachers, is :

1. The possibility to add subtitles and … ready for this?  You don’t have to add them manually, the app automatically writes them for you. This feature is still in BETA and it might not be a 100% accurate but you can always edit the text. Plus, it works with a number of languages, not only English.

More? Yes? Coming!

2. Once it has subtitled the video, you can ask it to translate the subtitles into again, several languages. How cool is this!!!! I have tried Spanish into English and it works just fine! Not 100% accurate but almost and remember, you can always edit it.

In this video tutorial, you will see how to do it. I have also unmuted the video and added music to it using Kapwing.

You can also

  • Edit a video from YouTube
  • Add Audio to video.
  • Remove the sound of a video.
  • Resize the video.
  • Convert video.
  • Remove the background from a video.
  • Create stop motion videos.
  • Reverse a video.
IMAGE

3. There are a few things you can do with an image but the most attractive one for us is the possibility of adding audio to an image.

You can also create collages mixing image, video and gifs. Maybe not very useful, but fun and visual.


More?  You can also create Memes and work with GIFS.

Although it is not necessary, you will get better results if you register. Remember it is free although it also has a paid version. One of the advantages of registering is that your videos won’t have the Kapwing watermark and this is an added bonus.

There are many great ways to enjoy your spare time. I know. Playing with technologies might not be one of them for you. But, if you happen to find yourself with some extra time, why don’t you give Kapwing a try? I think you will love it!

Otter.ai: an Awesome Free App to Get Accurate Transcript from Audios/Videos

Let me start by saying that this is not a sponsored post. I don’t get paid to write about tools. I just write about what works for me. And thisss …. has already saved my life 3 or 4 times.

Imagine this!  You have an awesome video/audio in your computer or on the internet that is great for the topic you are discussing in class. You want to give it to your students, but you cannot find the transcript. It is simply not available.

What do you do? I am going to give 2 options:

  1. Discard the audio/video. After all, you can always use something from the textbook.
  2. Use an app that will easily, effortlessly and accurately transcribe it, giving you the possibility of downloading it in different formats (including Docx), without time stamps and ready to share with your students?

If you have chosen Option 1, you may stop reading. This post is not for you. Hope you continue to drop by.

Those of you choosing Option 2, I can picture you rubbing your hands and holding your breath. Here we go!

Otter.ai is a mind-blowing text-to-speech tool. It is very user-friendly and the transcription you get is incredibly accurate. Perhaps, you might need to add a comma or a stop here and there but that’s it. It is almost perfect.

For free, you get 600 minutes of transcription per month but if you need more, you can always invite friends or colleagues to try Otter.ai. For every friend that decides to try Otter, you will get one month Pro Lite.  Not a bad deal! So, the link I am going to share with you is the one that will allow me to get one-month Pro Lite. There is no money for me here, just the opportunity to enjoy more free minutes of transcription.

I have created a video tutorial to guide you through the app. It is in Spanish but, don’t panic, I have added some explanatory notes with instructions in English.

A big thank you to Miguel A Sánchez (Michel) for bringing it to my attention.

Edited to include contributions and tips from other teachers

  1. “It also records sounds from a YouTube film opened in a different tab. Much better than YouTube transcript.” – Ewa.
  2. “It’s awesome to give feedback in oral exams. I provide my Sts the transcript and underline the death-penalty mistakes. They realise at once and correct them, something that hardly ever happens if they just listen to themselves” Loli Manteiga.

Try Otter here


Lesson Plan for C1: Politics and Politicians.

I am certain I am not the only one who is fed up with politicians. Should you ask my friends, they’ll tell you that I never talk about politics. I never criticize or praise politicians. I talk about life, about life issues, but always being respectful of other people’s attitudes. I don’t like radical people. I don’t want them around me. I know that some of you might think knowing about politics is a necessity. I don’t disagree.  However, getting into heated arguments with people who have a different point of view is, in my opinion, a waste of time and frustrating. So, I don’t do it. And, in this frame of mind, I will approach this lesson about Politics.

PDF Teacher’s     PDF Student’s

Warm-up. Whole class
  •  What’s the first thing that pops into your mind when you hear the word POLITICIAN?
  • What is the minimum voting age in your country? Should it be higher or lower?   See: Voting age around the world
  • What are the main political parties in your country? Who is the most controversial politician?  useful vocabulary here.


Working on Vocabulary: Adjectives
  • On the board, write three headings: positive, negative and neutral and ask students to do the same in their notebooks. Tell them you are going to dictate a list of adjectives and qualities that can be applied to politicians.
  • Start calling out adjectives and ask them to place them under one of the columns. You might need to spell some of them, or alternatively write them down on the board. It is a good opportunity to drill pronunciation and clarify/teach meanings.
  • Do the exercise on the board. There might be slight disagreements and that is just fine.

Focusing on Listening:  How the US  and the UK election works

This listening exercise has different parts

Individual work:

  • Students are divided into pairs. Student A listens to How the US election works and Student B to How the UK election works. In my case, I have set it as homework but you can do it in class, asking students to bring some earbuds.
  • As students listen, ask them to write down any words/expressions related to the topic. Ask them to look them up and practise their pronunciation as they might be asked to explain some terms to the class.

In class:

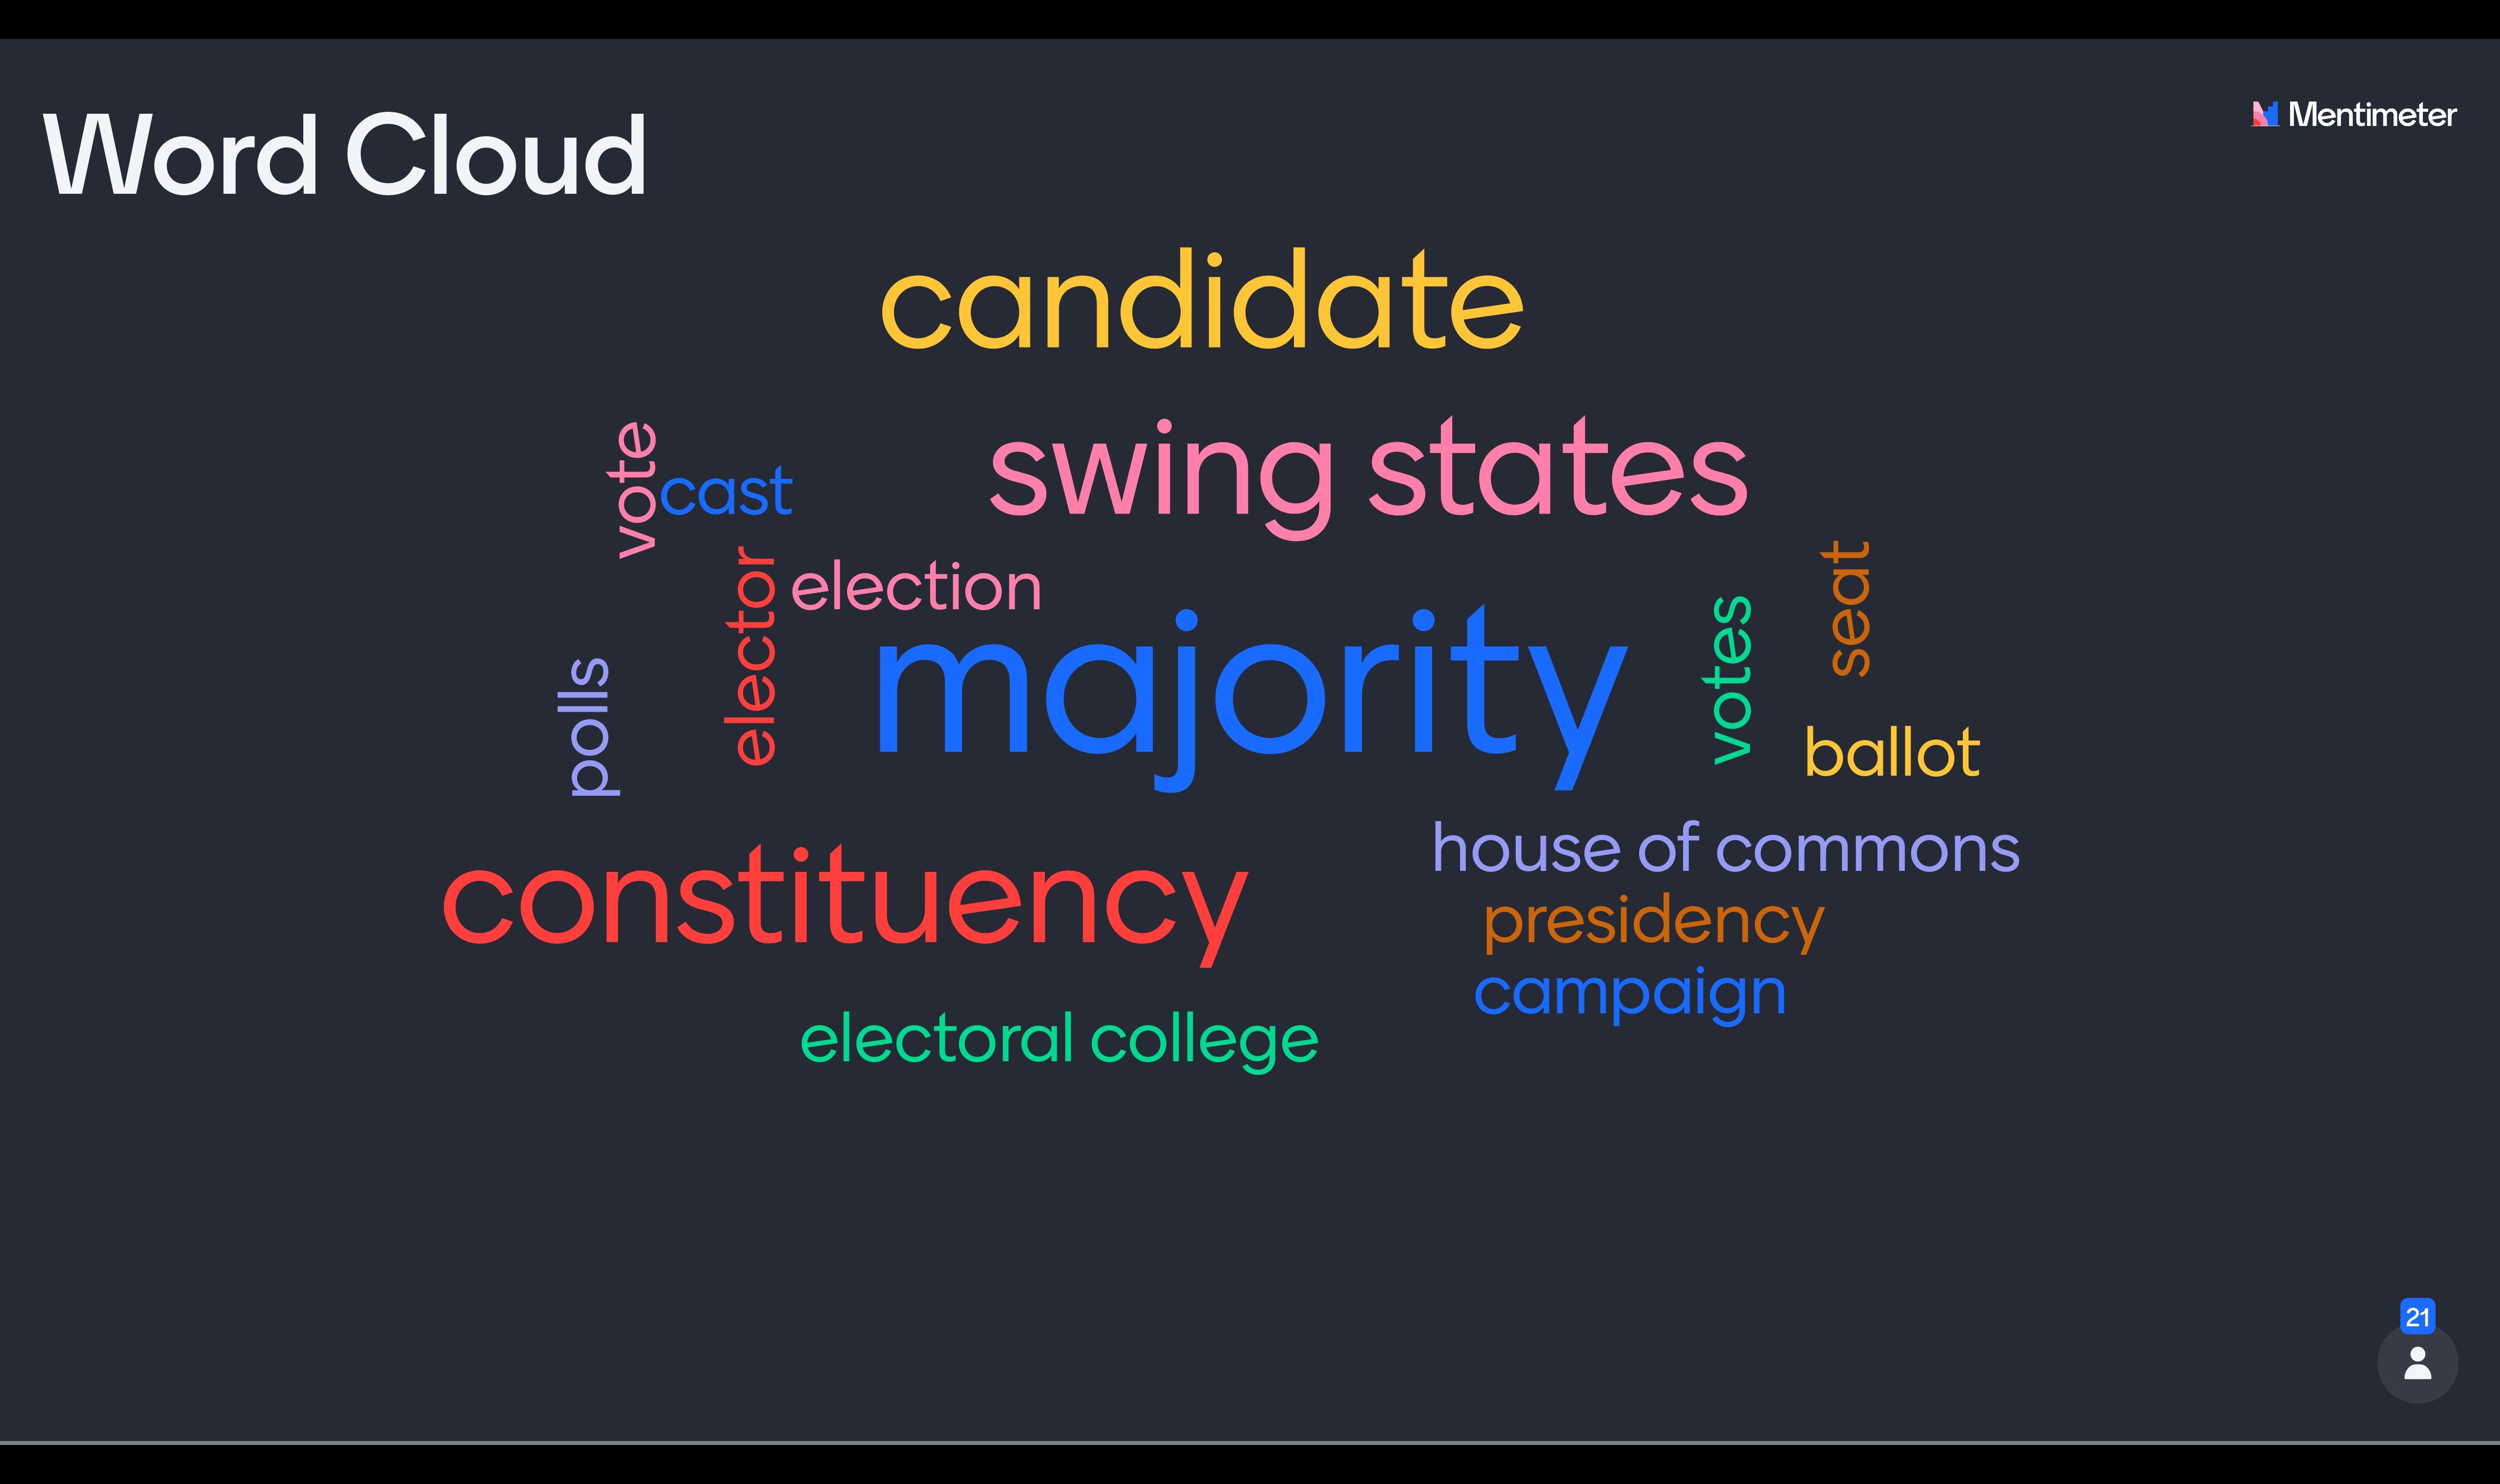
  • Using Mentimeter, ask them to write the words they jotted down from the video. Once the cloud is formed, point to one word and ask them to explain it.

  • Pair up A and B and ask them to report their findings.

Student A. How the US election works

Student B: The voting system in the Uk

Follow up: Cloze with a twist.

Give students the transcript for both videos. Tell them you have deleted some words from the transcript. They will have to listen very attentively as there are no empty spaces showing there is a missing word. Ask them to compare in pairs before correcting the exercise.  You will find the exercise in the PDF.

Working on Vocabulary

Have a look at how these verbs collocate

  • Boost the economy
  • Harm/benefit someone or an organization
  • Put a strain on the finances of a country/area
  • Exacerbate a problem
  • Undermine the morale of citizens
  • Create divisions
  • Lead to tensions
  • Cut taxes
  • Extend working hours
  • Increase public spending
  • Abolish unemployment benefits
  • Allow a vote on independence
  • Increase penalties for…
  • Damage the economy
  • Resolve existing social problems
  • Rise of income inequality
  • Reform the education system
  • Solve social problems
  • Ensure prosperity
  • Hold an election
  • Rig the election
  • Stand for election

Other words you might want to know: floating voters. popularity ratings, a right-winger, a left-winger, a polling station, a running mate, a high turnout, voting booth, ballot card

Speaking

Before each section, ask students to call out 6 words or expressions they have learned in this unit. Divide the class into As and Bs and assign As three words and Bs three words. Display the first section and ask them to take in turns to answer the questions trying to use the vocabulary on the board

Politcs and Policiticians


Speaking and writing using Flipgrid

I have been dying to use Flipgris’s new update. “And what is it that has you so excited?” -you might be wondering. Well, it is the possibility of responding to a video in a written form.  Imagine the possibilities, imagine the potential it has for language teaching.

So, here’s the first activity for my students using the brand new Text Comments. I know it is a dangerous activity, but I teach adults and am relying on their self-restraint.

Lesson Plan: “What we learn with pleasure we never forget.”

I have to confess that I had to look up who Alfred Mercier, the owner of this quote, was. And I say “was” because although this inspirational poet was born at the beginning of the XIXc.,  he is very much in line with my way of thinking:  “what we learn with pleasure, we never forget”.

This has always been my aim: to teach trying to make my lessons memorable for my students. Sometimes I succeed, sometimes I don’t. But I am always trying. Anyway, I really believe the first five minutes of the class, mark its rhythm and that the way you present the information to students is of the utmost importance.

This lesson for C1 students focuses on education. It offers practice in the following:

  • vocabulary
  • listening
  • speaking
  • reading
Warm-up: What's the weirdest thing your teacher has done?

So, let’s start with some fun. On the board, write the word Weird and drill pronunciation. Show them the gif for a bit of fun and display or read some of the tweets sent to Jimmy Fallon’s hashtag game #MyWeirdTeacher. Here’s the link.  I think my fav is Number 1. That’s the one I would give my students as an example.

Ask the question: What’s the weirdest thing your teacher has done?. Give them some thinking time and listen to their stories.

Revising vocabulary

For a student, learning new vocabulary can be a bit overwhelming so it’s always a good idea to tap into students’ knowledge. It really helps make learning new words much easier. The method or activity used to extract previous knowledge should differ from the one used to teach new content using more dynamic strategies to work with the former.

A simple activity could be giving students 1 minute to write down as many topic-related words as they can remember, emphasizing words such as “teacher” or ” primary school” are not adequate for this level and will be dismissed.  I will be using Mentimeter for this activity but feel free to use the familiar pen and paper. The prize for the winner? a round of applause- we are suffering cuts in the school budget 🙂

Speaking and Writing: Small activities

Change one thing: If I could change one thing about the past school year…

Six adjectives: use 6 adjectives to describe your last academic year

What advice would you give to someone who is beginning to learn English?

Listening: What makes a good teacher? What makes a good student?

Pre-listening:

a. Give students some thinking time to come up with their ideas of what, in their opinion, makes a good teacher. This is a good opportunity to introduce vocabulary they will find in the video.

b. At the same time, ask them to write 3 adjectives that a good teacher needs to possess.

Before playing the video,  ask students to read the three adjectives they have written. Play the video once and see whose choice of adjectives are on the video. Play a second and even a third time and ask students to take notes.

Tapescript, here

Repeat procedure for What makes a successful student?

Introducing new vocabulary collaboratively

Give them the list of new words and ask students to underline the words they already know. This is a good way to guarantee you are not going to be the only one doing the work here and they will be engaged throughout the activity. After a couple of minutes, go through the list asking individual students to provide definitions and give examples. Clarify and exemplify any real new words.

Get the PDF here

Drill the pronunciation of…

  • creativity
  • data
  • discipline
  • plagiarism
  • poem
Speaking Interactive Posters : thumbs up, thumbs down.

Present the students with the following statements, one at a time, and ask them to give a thumbs-up or a thumbs-down to indicate whether they agree or disagree with the statement on display.

Once they have established where they stand, click on the interactive button on the poster, displaying suggested vocabulary they can use when presenting their point of view. Give them one minute to plan what they are going to say. Repeat procedure with all or some of the posters.


Further Practice. Homework