Monthly Archives: May 2022

Writing: 5 Useful Exam Tips

I get it. Writing test. These two words don’t look super inviting or inspiring, but trust me, if you follow these tips, it might help you pass or, at least, enhance your writing skills.

I think we have already discussed here at length my obsession with using the vocabulary and structures that I teach in class. That’s non-negotiable. You have to use them. So, I am not going to beat about the bush here and I am going to state the obvious, the two most important tips are:  study and practise. As much as you can. But you already know that, don’t you?

Once we have agreed on these two tips, these are the ones I give my own students. Some students follow them. Some don’t. Some try  🙂


Don’t start writing straight away. Spend about 10 minutes getting ready. You might grow anxious and think this is a waste of time. It is not. In fact, in my humbe opinion, it should be mandatory. Use these 10 minutes to plan what you are going to say and how you are going to say it.

So, you are given the task. Now what?  

  1. Identify the task. It is very important to read the information in the task carefully, underlining any keywords or any questions you are being asked to answer. Identify the topic: is it about sports, work, holidays?
  2. Identify the audience. Who is going to read it and what language do you need to use? Can you use informal language because it is an informal email or maybe a post for a blog or do you have to use formal language because it is a formal letter or email or maybe a report? 

Now that we have clearly identified the topic and the kind of task we have been asked to fulfil, spend some time doing some brainstorming.

Ask for some draft paper and brainstorm…

  1. Vocabulary. Make a list of all the specific vocabulary you remember about the topic (that includes phrasal verbs, collocations, idioms…, etc) The teacher will be looking for specific vocabulary related to the topic. Make sure you use a wide range of vocabulary. As you start writing, find a way to naturally introduce this vocabulary.
  2. Grammar. Make a list of all the grammar and structures you want to use. The teacher will be looking for a wide range of grammar and structures adequate to the required level, but make sure you sound natural and communicate clearly. If you overuse structures or “force” the use of others just to show off, it might have the opposite effect, as it might be inappropriate and possibly confusing.  For example, if in this course you have learned perfect modals – might have worked- try to use them in your essay;  or if you have learned inversions, try to use them, but do not use 3 or 4 inversions just because you know them. It would not sound natural.
  3. Connectors and Linkers. Make a list of connectors and linkers you want to use to contrast different points of view or join ideas. Remember that you will be required to elaborate on your ideas. Words such as “ and” or “but” are fine, but you are not going to impress the examiner by using these very simple linkers. 
  4. Ideas. Finally, brainstorm ideas and choose the strongest ones and the ones you feel most confident developing.

Clear paragraphs. Now you are ready to begin writing your draft. Organize your essay into clear paragraphs 

  • Introduction
  • Body ( here you can have 2, 3 or more paragraphs)
  • Conclusion

A good idea might be to start each paragraph with a strong idea and then elaborate on it,  making sure you back your idea or opinion with reasons and examples. 

New idea, new paragraph.

Have you written your draft? Awesome! Now, reread it and consider adding:

Adjectives to add colour to your work. For example, if you are describing a house, you can write “an elegant house” or “a red-brick house”; if you are writing about “work”, you can modify it by saying “ challenging work” or “rewarding job”. My favourite website for this is Ozdic

Adverbs:  you might want to introduce some sophisticated adverbs such as: remarkably, noticeably…etc

-Strong collocations: have some up your sleeve in case you have the chance to use them. For example: take for granted, draw an audience…etc

Carefully proofread your essay before handing it in. Make sure you check your work to avoid making obvious mistakes:

  • spelling mistakes
  • subject-verb agreement
  • singular-plural agreement,
  • punctuation …etc

Llast tip? Read it to yourself. If it sounds confusing to you, imagine how it would sound to the teacher. You still have time to rephrase what is not clear.

Now you are ready to write your essay on the exam sheet. Be extra careful when copying from the draft. I have found that students when copying from the draft if in a hurry, tend to make spelling mistakes. After all this effort, you don’t want to do that. 

I hope these tips help you and you score high on the writing test. Best of luck!
 

Oral Exams: Two Activities to Revise all the Topics in a Single Lesson

I know precisely what you are looking for because I guess,  we are all in the same boat: approaching finals, a plethora of topics to revise and juggling work and life. These two activities might come in handy now that you, like me, need to help students  1. revise the vocabulary for all of the topics covered during the course and 2. provide the means to use this vocabulary in spoken interactions or monologues. And this, in a single lesson. Granted it is a two-hour session, but still a feat.

What’s the aim?

  • to develop their communicative skills by asking and answering questions  about different topics
  • to compose a short speech on a topic of choice
  • to revise the specific vocabulary learnt for these topics

ACTIVITY ONE: Throwing the Dice. Revising Vocabulary. Asking the questions.

What you need:

  • slips of paper
  • sticky notes or, alternatively, scraps of paper and cellotape.
  • a dice or a virtual dice (here)

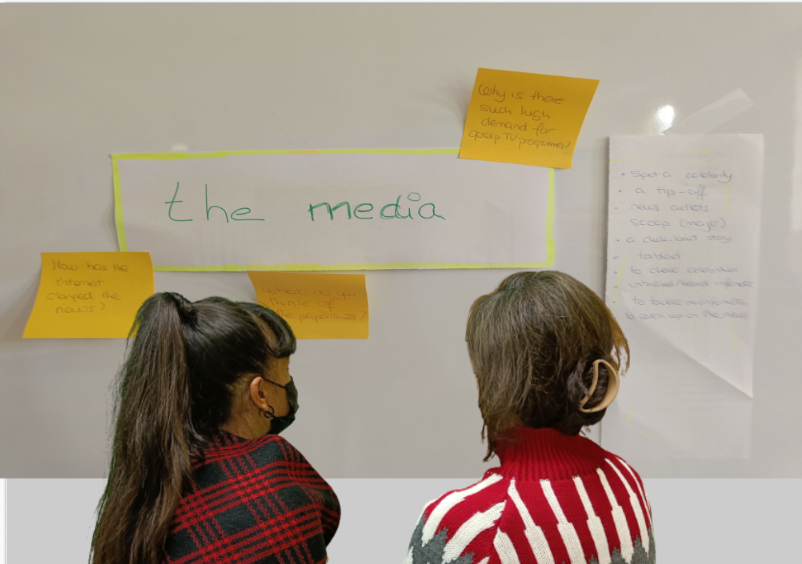
On the walls of the class, put up slips of paper with the various themes you wish to review: work, sports, education, leisure time activities…etc.

Step 1. Revising Vocabulary

  1. Put students into pairs or groups. You’ll need as many pairs/ groups as there are topics you’ll be revising.
  2. Assign each pair/group a topic and ask them to write down all the vocabulary/expressions…etc they have learnt related to their assigned topic. Have them name a secretary who will be in charge of writing the vocabulary on a clean sheet of paper and trying to write in legible handwriting.
  3. Give them some cellotape or blue-tack and instruct them to tape/stick the vocabulary on the wall,  next to the topic they have been assigned.


Step 2. Throwing the dice. Writing the questions

1. Assign to each number on the dice a wh-word and write it on the board. For ex:

  1. why
  2. where
  3. when
  4.  what
  5. how
  6. who

2. Now, roll the dice and ask pairs/groups to choose a topic and write a question beginning with the wh ( for example if the number is 4, they will need to write a question beginning with “what”) and related to the topic they have chosen. Make sure pairs/groups choose different topics. Encourage students to write interesting questions or questions that can generate conversation.

Ex: the topic is Crime and the number is 4; the question might be something like :

What are the most common crimes in your town?

3. Once they have written the question, ask them to post it next to the topic the topic it pertains to.

4. Throw the dice again and repeat procedure only, this time, groups must necessarily choose a different topic. Again, make sure all topics are covered. Hopefully, when you roll the dice, it will show a different number. If it is the same number( say number 4 as in the example), throw it again, you want a different Wh- question.

How many questions do I think would be more than enough for each topic? I would suggest 3 questions/topic

Step 3. Gallery Walk

Gallery walk: Once you have at least 2 or 3 questions per topic, ask students to stand up in their groups and stand next to a topic and together read the vocabulary for the topic they will next to it.  Then, have them read the questions and discuss them. Allow about 10 minutes per poster and then ask them to move clockwise to the next topic. Repeat procedure.

ACTIVITY TWO: Tearable topics. Beautiful template

It is not the first time I have used a tearable activity- if I may call it like this-, but it is the first time that I have used Meredithakers’s template. I saw her design and I thought ” I need to use it”. So cute. Have a look at her design here and if you don’t read her, I highly recommend it.

NOTE: This activity follows the first one where students have already had the opportunity to revise vocabulary. If you choose to do only this activity, give students some time to revise the vocabulary they will need to give a great speech.

Before the class: Edit a copy of my/her template and write your own content. My template here

Cut a line between words but don’t cut them all the way so that the slip of paper doesn’t detach. I guess a copy will be enough if you have a class of 24 students or less.

Divide the class into groups of 5-6 people. You can easily create 4 groups of 5-6 people as there are 24 tearable strips of paper. Topics might be repeated, just make sure they are not repeated within the group. In fact, for easier identification, you can divide the class into 4 groups and assign a colour to each group. They can only tear off a topic highlighted in their assigned colour.

Give them about 5 minutes to prepare their monologue encouraging the use of vocabulary and grammar.

Isn’t it a beautiful template? I told you! Thanks @meredith