Monthly Archives: May 2018

A QR Code Coursebook Quest Using Flipgrid: Using Technology in the Classes

Ohh this activity. I love it.

It combines a bit of everything and adds the touch of innovation students require in 21st-century classes.

  • it helps students revise content in an engaging way
  • it helps boost their speaking skills
  • it improves their writing abilities
  • it gives them confidence using new technologies
  • it promotes teamwork.

Now, this is an end-of-the-course activity and before you continue reading you need to know a couple of things.

  1. My students have already used Flipgrid in class. (if you have never used Flipgrid, you are missing out! I highly recommend it to make even the shyest students talk)
  2. My students have already used a QR Code reader and have the app on their mobiles.
  3.  Finally, you’ll have some prep work to do, but it is an end-of-the-course activity, so let’s do it! I promise it’s worth it. Then, we can rest and sunbathe a bit.

The activity is divided into two stages

STAGE ONE. Day 1.

Before the class:

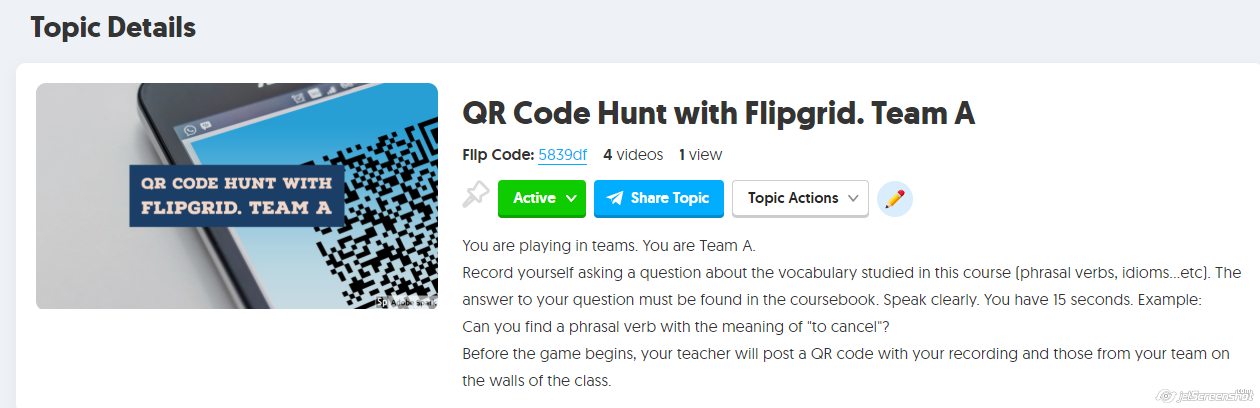
  • On Flipgrid, create a topic outlining the activity and asking students to record themselves asking a question about the vocabulary studied during the course. It can be anything that has been studied during the course. In my case,  I have asked them to make their question about phrasal verbs or idioms. The only rule is that the answer to their question must be found in the course book.  Remind them that this is a competition, so they do not want to ask easy questions. Ask them to record themselves asking their question using Flipgrid and tell them they have 15-seconds recording time.

Example: Can you find a phrasal verb with the meaning of “to cancel”?

  • Once you have created a topic on Flipgrid for Team A, as in the example below, duplicate the topic and just change the Topic Title by writing Team B instead of Team A. You might also want to modify the image accompanying the Topic. (not necessary, of course)


In class:

  • Divide the class into two teams; three if you have a lot of students. Ideally, a team would have 6-8 students and the same number of students in each team. If you don’t, just ask a student to record himself twice, asking two different questions so that both teams have the same number of questions.
  • Share the Flip Code to their respective topics and ask them to record their questions for the other team. Each student in the team has to record a different question. So, if you have 6 students per team, you’ll have 6 questions. This can easily be done in class or set as homework.
  • Explain the rules:
  • They can ask a question about … (whatever you have specified).
  • The answer to their question must be found in the course book.
  • They have to speak slowly and clearly.
  • They have 15-seconds recording time.
  • When they finish, they will need to send you an email with the answer to their question.
Stage 2. Day 2

Before the class:

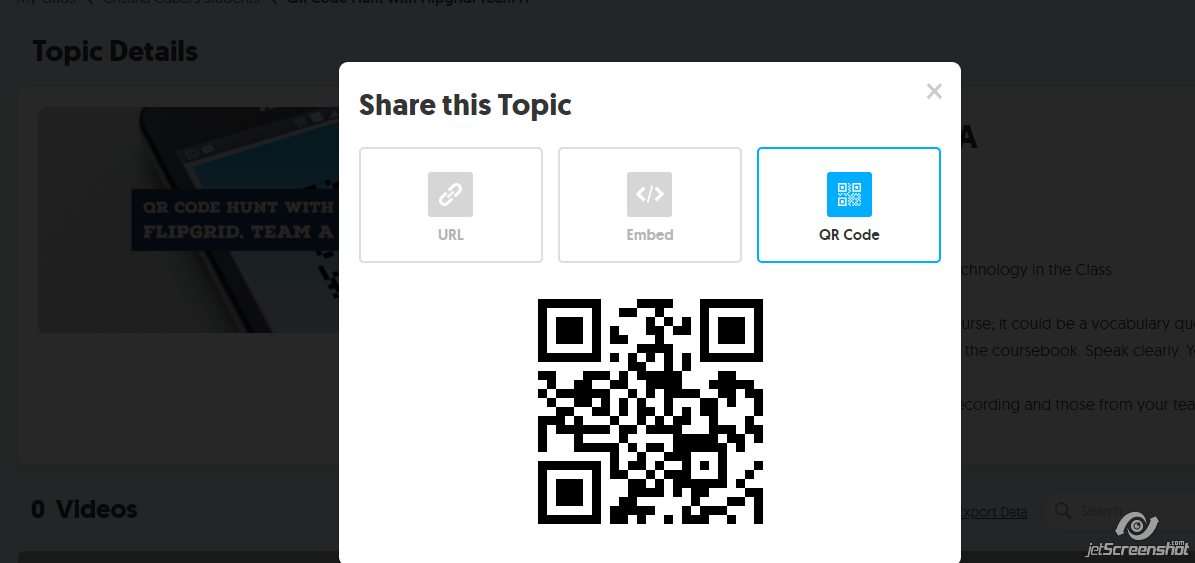
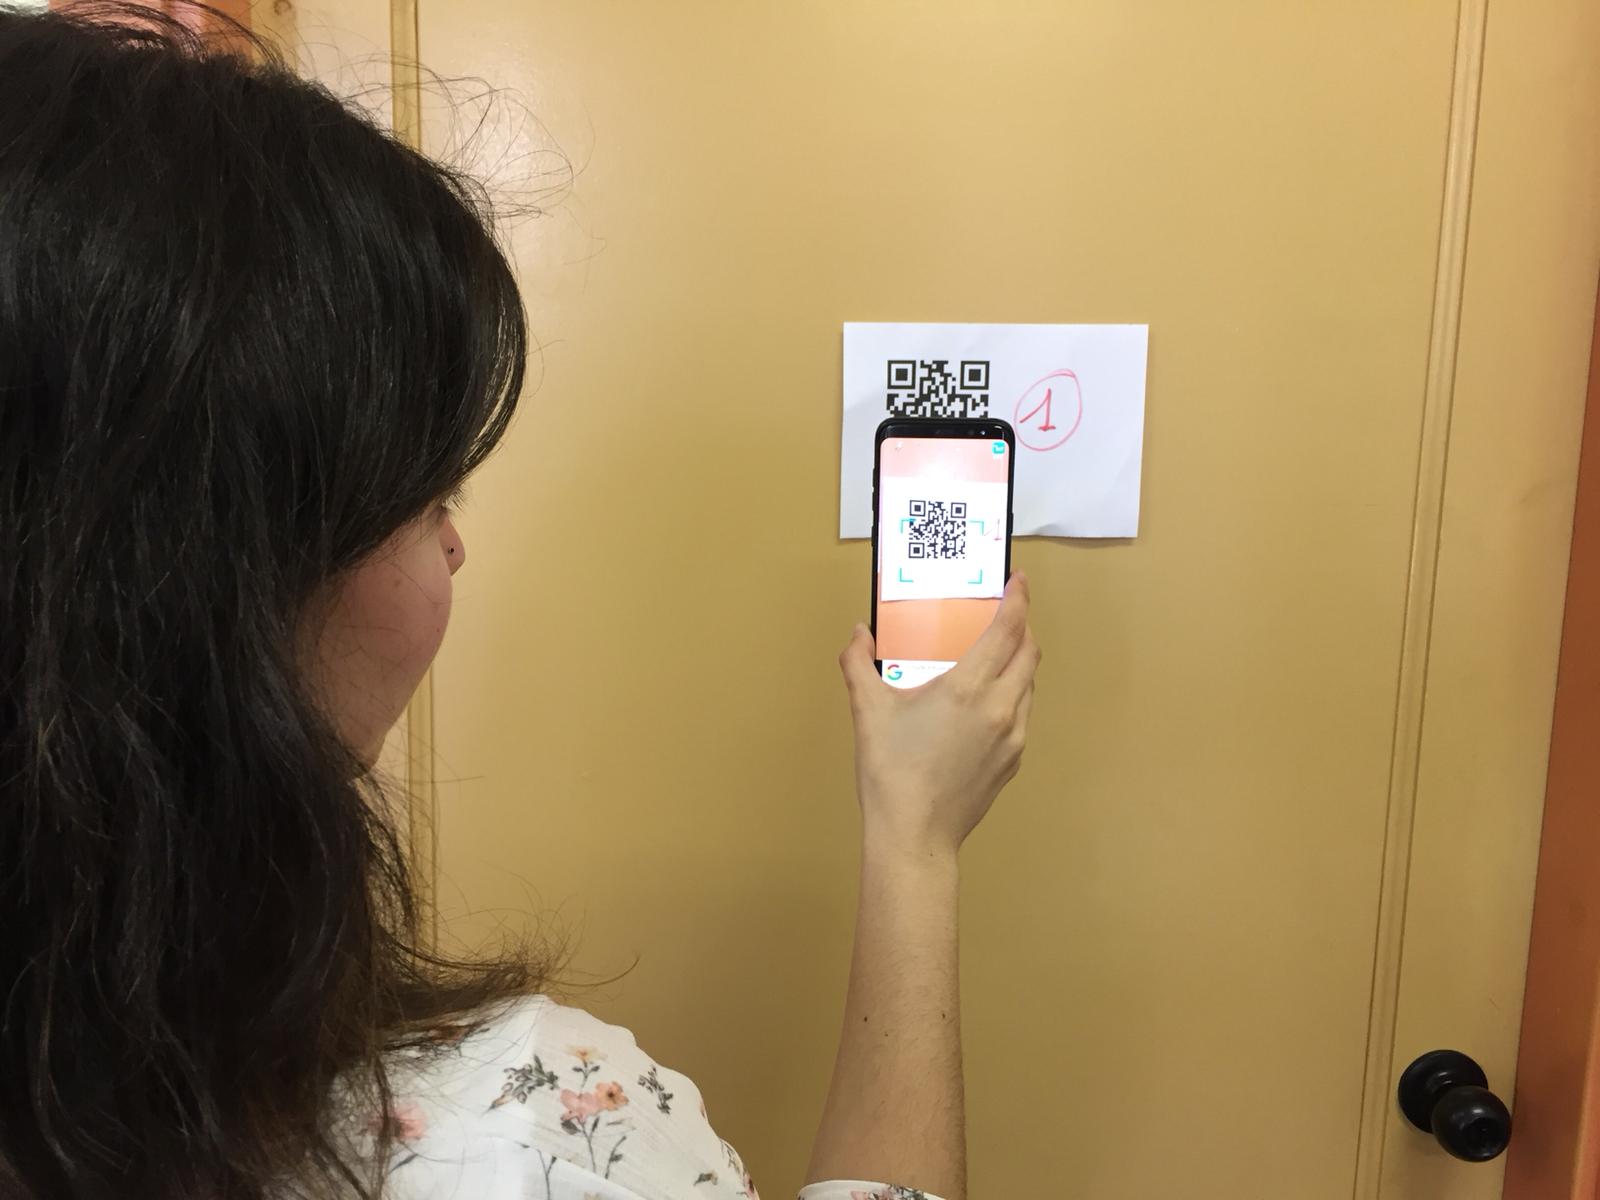
  • Once all the students in the team have recorded their questions for the other team, print the QR Code for each of their questions and hang them up on one of the walls of the class. Give each QR code a number, ie, if there are 6 QR Codes containing 6 questions, give numbers from 1 to 6.  On your response sheet, write down the answers matching the different  QR codes. For example 1. take off 2. put up 3…  Do the same for the other team, but hang up their  QR Codes on the wall opposite.


In class:

  • Ask students to sit with their teams.
  • Explain how to play:
  • Show both teams their respective walls. Assign Team A the wall where the QR Codes with Team B’s questions are displayed. Do the same for Team B.
  • Only one mobile phone per team is necessary and only one can be used. Teams name a runner who scans the QR code and gets back to his team who try to find the answer in the course book to the question posed. The first QR Code to be scanned must be number 1.
  • Once they have found the answer in the book, the runner must go to the teacher and show it to him. If it is incorrect, he must go back to his team and try again. If it’s correct, the runner goes back to his team and, using the target vocabulary, write a  sentence. Again, the runner runs to the teacher and shows him the sentence. If there are no mistakes, he can scan the second QR Code. If there are mistakes, the teacher will underline the mistake(s) and then, the runner will return to his team, correct the sentence and show it again to the teacher. Only when everything is Ok, can the runner scan the second QR code.
  • The winner is the team who first answers all the questions and uses the target vocabulary in sentences of their own.

If you want to know more about how to integrate free digital tools in the classroom, you might want to have a look at my workshops. Here and here. 

Thanks for reading!

8 Google Chrome Extensions you “Add”solutely Need to Use if you are a Teacher

I have been struggling with the title of this post. I wanted to write it in capital letters and tried different angles, all with the same purpose, trying to entice you into reading it as I know for certain that, for some teachers out there, add-ons ( also known as extensions) are still unknown.


Introduction

Working as a “free app” teacher trainer has taught me quite a lot of things. I have seen that, contrary to my initial belief, most teachers are not afraid of introducing technology in their classes, they just don’t know how to do it or where to get started. Once they realize how easy it is to create their own activities, how little effort it takes to create meaningful activities for their classes using the feared apps, there is no ending to their requests to learn more and more, which is just awesome! On this post, I am going to comply with a request from one of the teachers attending the workshops at CPR Cuencas. Carlota, this post is for you.

During these workshops, over the course of a conversation I mentioned, and probably showed, the add-ons I use on Google Chrome to make my work more productive.  Surprisingly, most of the teachers attending didn’t even know what I was talking about. I promised I would show them the ones I used. But, with so many things to teach, we didn’t have time. I’m sorry. It took me a while to write this post, but here it is.

First of all, the basics

What is an add-on or extension?

These little icons you see next to the address bar are called add-ons or extensions. They are small apps that add extra features to Chrome and can improve your productivity, for example by correcting your spelling or grammar mistakes.  Awesome, isn’t it?

How do I install an extension?

Just click here and write the name of the extension you want to install.

How do I manage my extensions?

(it has background music)


My favourite Google Chrome Extensions

The ones I cannot live without, and in no particular order, are the following:

1. Send from Gmail by Google

The easiest and quickest way to share links

Let’s imagine this scenario. You are on a website you very much would like to share with a colleague or just send to yourself to explore later.  There are many things you can do with this link. For me, the easiest is using the add-on above, which will open my Gmail account. To do it, just click on the extension, enter the recipient’s address and click Send.


2. Tab Resize- split screen layouts

The easiest way to split your screen into separate tabs

Very often, we need to see the content of two or even three windows in the same screen. For example, when doing a grammar exercise online we often need to refer to the grammar or when correcting a listening comprehension we might also want to display the transcript.  This is easy with Tab Resize. You just need to click on the icon and choose how to split your screen.


3. Grammarly for Chrome

To make sure you don’t send an important document or an email with spelling, grammar or punctuation mistakes.
Isn’t it helpful? I don’ t know about you, but I am not perfect.

Look at the picture below. Writing this blog, I have made a spelling mistake. Immediately, my mistake is highlighted and an alternative suggested which, of course, you can choose to ignore. Wow!


4. Bit.ly

To shorten the links you want to share

Isn’t it true that very often we need to provide students with a URL that is impossible to write because of its length? When this happens, what do you? I use bit.ly, which is a URL shortener. Surely, you can go to their website and copy-paste the URL to obtain the shortened URL, but wouldn’t it be more productive to just click on the icon, copy the shortened URL and share with your students or colleagues? That’s what I do!

Once you get the shortened link, just write on the board for your students to copy. A piece of cake!

(it has background music)


5. Google Dictionary

With this extension installed, finding the meaning of a word and how to pronounce it couldn’t be easier. There are two ways to do it:

  1. Double click the word and you’ll see a little pop-up bubble showing a brief definition.
  2. Select the word and click on the add-on icon on the toolbar to get the complete definition of any word.

Note:  after installing the add-on, either reload your open tabs or restart Chrome.


6. Pinterest Save Button

To curate the web

I have been using Pinterest since it was first launched. I don’t think I could live without it. That’s the place where I store every inspiring idea that I see on the web, every activity I want to use in class, every blog that I want to read or every video I want to play in class.  Over the years I have tried other tools to organize and collect content but I have yet to find one that is as simple and as widely used as Pinterest to curate content. Suffice to say, I have about 150 boards and growing. See them here.

So, how does it work? Let’s say you see an interesting activity you want to use in your classes, but will you be able to remember where you read it?  I don’t know about you, but I read so many blogs that it’s impossible to remember who wrote what and where.

The extension Pinterest save Button has really saved my life. I see something I like, I click the Pin button and store it in one of my boards. See the video below. Obviously,  first you need to create an account on Pinterest.

(it has background music)


7. Google Drive New Tab

This is just a shortcut to opening my Google Drive.  If you don’t use Google Drive, then it’s not very useful to you but if you do,  it saves lots of time.

So, just click on the icon on the toolbar and a new tab will open on your Google Drive. Simple but effective.


8. Awesome Screenshot

An add-on that lives up to its name. It allows you to easily capture all or parts of any webpage. You can add comments and annotations and also blur some parts. It also allows you to record your screen in an easy way.

Thanks for reading! I know it is a long post, but hasn’t it been worth it?

Countable and Uncountable Nouns: a Game and a Quiz with Partitives

Most of the times, it is easy to tell when a noun is countable (ie. can be counted) and when it is uncountable.  Think about the words “dog” and “sugar”. Easy, isn’t it?

We can say one dog, two dogs or a dog, ie, you can count “dogs

But can you count “sugar”? Of course, you can’t. You can’t say one sugar, two sugars or sugars, not even a sugar.

If only it were that easy! 🙂 Take for example vegetables and fruit. Vegetables are countable, but fruit is normally uncountable, though in some cases, to complicate things, it can be made plural when referring to different kinds of fruit.

The vast majority of commonly consumed fruits qualify as non-starchy.
Would you like some fruit for dessert?

There you have it, this is English!

If you want to know more about countable and uncountable nouns, here,  it is clearly explained.

On this post, I want to share with you two activities I did with my Upper-intermediate students in case you want to use them in your classes.

 Game: Sit down. Stand Up

The first one is a very simple activity, perfect to use after a tedious lesson when you see attention is beginning to fade. Actually, it is not a game as there is no competition and nobody is eliminated but, to be honest, I don’t know how to call it. An energizer, perhaps? What is clear is that it will keep your students engaged and motivated.

I have used this activity with upper-intermediate students so the concept of countable or uncountable (mass) is not new to them.

Before the class: prepare a list of names that are clearly either countable or uncountable.

How to play:

  1. Tell students you are going to call out nouns that can be classified as either countable or uncountable.
  2. Tell them they will need to sit down if the noun is uncountable and stand up if it countable.

This is the list of nouns I have used:

Uncountable nouns: weather, advice, accommodation, luggage, staff, furniture, scenery, rubbish, behaviour, health, cotton, politics, work, homework, news, clothes, money

Countable:  vegetables, worksheet, newspaper, item, journey, grape, difference

As you can see there are far more uncountable than countable nouns because my students already have a clear idea of what countable and uncountable means. If you are introducing this concept for the first time, I would suggest you use more or less the same number of countable and uncountable nouns.

The Quiz

So, how can we make an uncountable noun countable? That’s easy! Very often, we can use “a piece of…” before the uncountable nouns.

We can say:

A piece of fruit/cake/cheese/baggage/furniture/news/rubbish/research… etc

But English wouldn’t be considered one of the richest languages if you could just use “ a piece of” with every uncountable noun, would it? So here’s a quiz where you will learn some other partitive structures used with uncountable nouns.

How I suggest you work with the quiz:

You can certainly do the quiz once if you have a prodigious memory and are able to remember every combination, but if you are like the rest of the mortals, taking the quiz once is not enough.

I would suggest taking the quiz two or three times, then writing down all the combinations you can remember and then taking the quiz again to check and consolidate.