Category Archives: freeware

My latest Tech Crush: Fluentkey. An Interactive Listening Competitive Game

If you have been following me for a while, you must know that I am deeply into technology. I don’t know how it happened. I am not a digital native. Far from it. I don’t know. I think it was love at first sight. We have been together for almost 14 years and I don’t think we are going to split up anytime soon.

Technology is so integrated into my lessons that I no longer realize how often or how many different activities I have created with a certain tool. Technology is just part of the lesson and using it feels like having a break. Like  having a shower after a long day. Students are beginning to tune out? Time to introduce an activity created with a digital tool. Carefully planned, of course. With methodology, of course.
Anyway, the hardest question I’ve been asked lately has been, “What’s your favourite digital tool to use in class?” Well, this is hard for me to answer. I have so many. The question I  automatically asked was: What for? There are some tools that are more versatile than others but if I had to answer, I’d wince( I love so many) and say the ones where students can take an active role and that add an element of healthy competition. And the tool I am going to share with you today offers that.

Can you imagine a tool, just like Kahoot, but for Listening Comprehension activities? That’s what FluentKey.com/live is.

There are lots of different ways we can exploit video or audio in class. Some more engaging than others. Well, let me tell you that Fluent key is totally engaging. It is just the tool I was waiting for. It makes listening fun by turning real-life videos into an interactive game student can play using their mobiles.
Created by two language teachers, Hollin Wakefiled and Hugo Xiong and a software engineer Tajddin Maghni, it is bound to revolutionize the way we do listenings.

What is Fluentkey?

FluentKey Live is an interactive classroom listening game. The teacher displays a video on a projector while students race to answer comprehension questions on their own devices and compete for the highest score.

How does it work?

o Register for free
o Find the right video
o Choose Play Fluentkey/live
o Share the code with your students and ready to go!

Why do I like it?
The teachers:

o Are you up to your eyes and don’t have the time to look for a video and create the comprehension questions? No problem. Fluentkey has a library of ready-made videos with quizzes. You can find the right video for your class by using the different filters (level, category, theme). Choose the video, have a look at the questions in the quiz and if you like them, just share the code with your students and get ready to play.
o Do you like the video but need to modify some questions or/and add new ones?? No problem! Duplicate the video and edit it.
o Can’t you find the right video for you? No problem! 😆 Upload a video from YouTube or Facebook (Yes!!. Facebook.) or copy/paste the link,  click on Create a quiz and add your own questions. You can add multiple choice questions, fill in the blanks, matching… among others.
o Playing Fluentkey/live is completely free.
o You can adjust the speed of the audio
The students

o The students do not need to download any app. You just instruct them to go to fluentkey.com/live , type the code you give them and play.
o Students can use their computers, tablets or mobile phones.
o They can play individually or in groups
o The faster they answer, the more points they get

The game:

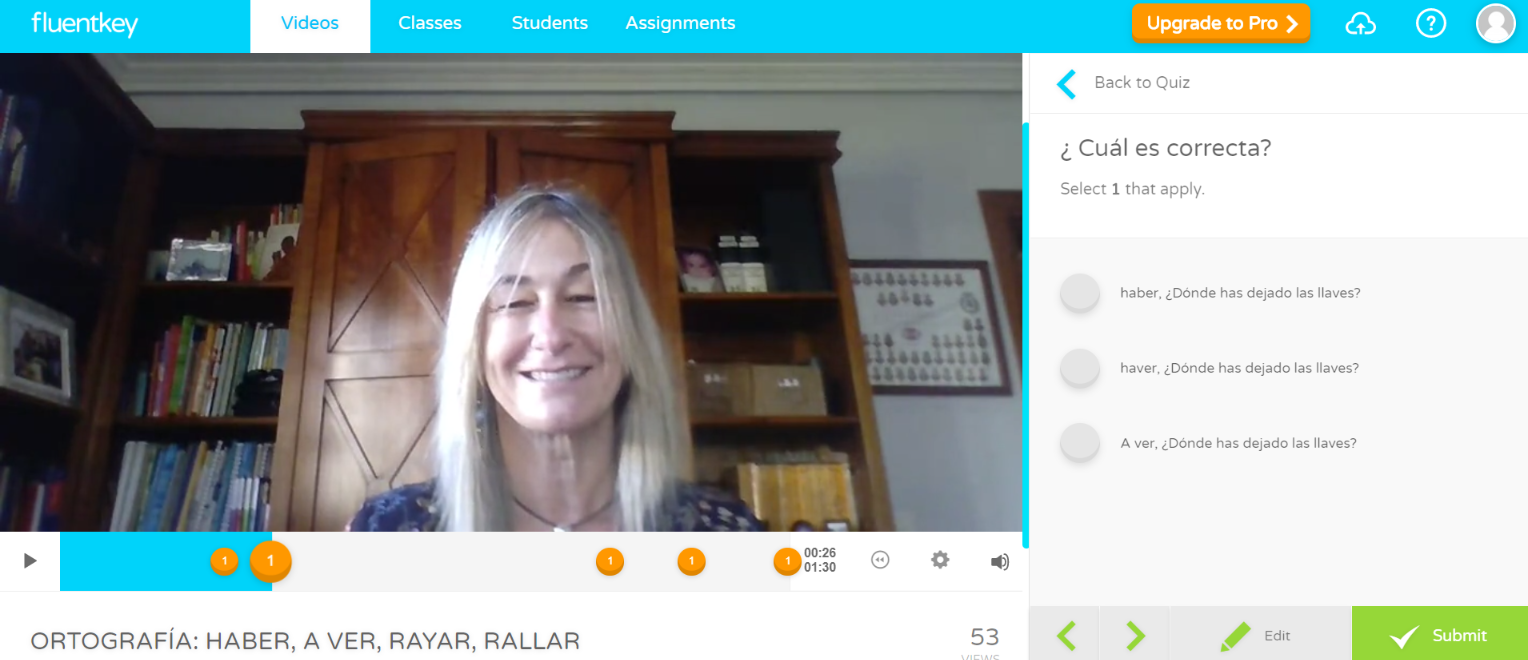
Once you press Play, the video will automatically play until it reaches a question. Students on their devices can preview the question and the kind of question (multiple choice, matching…) but the answers are not yet visible. At this point, the teacher can choose Watch again or Ready to answer. If you press Ready to answer, the answers show up on the students’ devices and a 30-second countdown begins. The faster they answer, the more points they get. Press Next to show the score and then again Next to keep playing the video

What I don’t like

o You cannot change the time students are given to answer a question. It’s always 30 seconds.

TIP: FluentKey was released only this year and they are still growing so not everything is perfect right now. I strongly recommend turning off the subtitles on YouTube before pasting the link on Fluentkey.

I’ll be presenting this tool for the first time in Menorca this weekend. Can’t wait to hear what teachers think about it!

Have a look at my face-to-face workshops: here and here.: the perfect combination of the latest technology and traditional teaching.
Tips and Tricks: Some Essential Basic Tools any 21st Century Teacher should Know About.

Do you know how to download a video from youtube or convert a PDF or a website into an editable Word document? Do you know where to find free images and videos to use in your projects or how to record audio and create a QR code to share with your students and colleagues? Did you know that long URLs can be easily shortened so that they can be shared more easily?

If you don’t, then this post might be for you!

I’m not a digital native. Far from it. Everything I know I had to learn by trial and error. However, right now, you can probably say I’m the typical technophile always on the lookout for new tools to create activities to spark up my classes.

The tools I want to share with you today are nothing fancy. You cannot create activities where your students will ooh and ahh, but trust me, they are going to save you a lot of time and a lot of searching. They have been tested and tried and I have been using them for a long, long time.


AUDIO AND VIDEO


Problem: I need to join/cut two audio files and I need to record myself on video/audio

Solution: 123apps.com/

This is a great tool to work with audio and video. It’s free, easy to use and you don’t even need to register.

What can you do on this page?

  • Cut video or audio ( you need to upload it from your computer)
  • Join two audio tracks
  • Convert video and audio from one format into another
  • Easily record video and audio ( and then download it)

Downside: you need to have the video/audio on your computer. Don’t worry, I’ll show you how to download a video. Keep on reading.


Problem: I need to record my voice/upload audio and then share it

Solution: vocaroo.com/ 

Vocaroo has been around for a long time. They are even working on a new and improved version. It lets you record your voice in a very easy way or upload a file from your computer. Then, you are offered different possibilities:

  • Download it
  • Share it on social media sites.
  • Share or email the link
  • Embed it on a blog or website
  • Get a QR code

Downside: Vocaroo does not provide permanent storage. There is not a definite age at which messages are deleted, however, it is likely messages will expire after a few months. If a message is important you should download and save it to your own computer as soon as possible to avoid losing it.


Problem:  My internet connection is weak and I need to download a video from a website other than youtube.

Solution:  videocyborg.com/

This amazing tool lets you download videos from any platform, even from youtube. To download a video, just get the link, copy/paste it into the box and download it. You can choose to download the video or just the audio.


Problem: My school has blocked facebook but I need my students to see a video there.

Solution: get the link for the video and then download it using  videocyborg.com/

Watch the video to see how it is done.


Problem: I need to cut a video from youtube

Solution: You need  tubechop.com/

Cut it, get the URL and then download it using videocyborg (link above)


TEXT


Problem: I need to convert a PDF into an easy editable WORD document

Solution: tools.pdf24.org/en/

This is a great tool to work with PDF. It’s free, easy to use and you don’t even need to register.

What can you do on this page?  Pretty much everything.

  • Convert a PDF into a Word document and  Word into PDF.
  • Split a PDF or merge them.
  • Sign or add page numbers to the  PDF.
  • Remove or extract PDF pages.


Problem: I need to convert a website into a PDF file or an editable WORD document

Solution: documentcyborg.com/

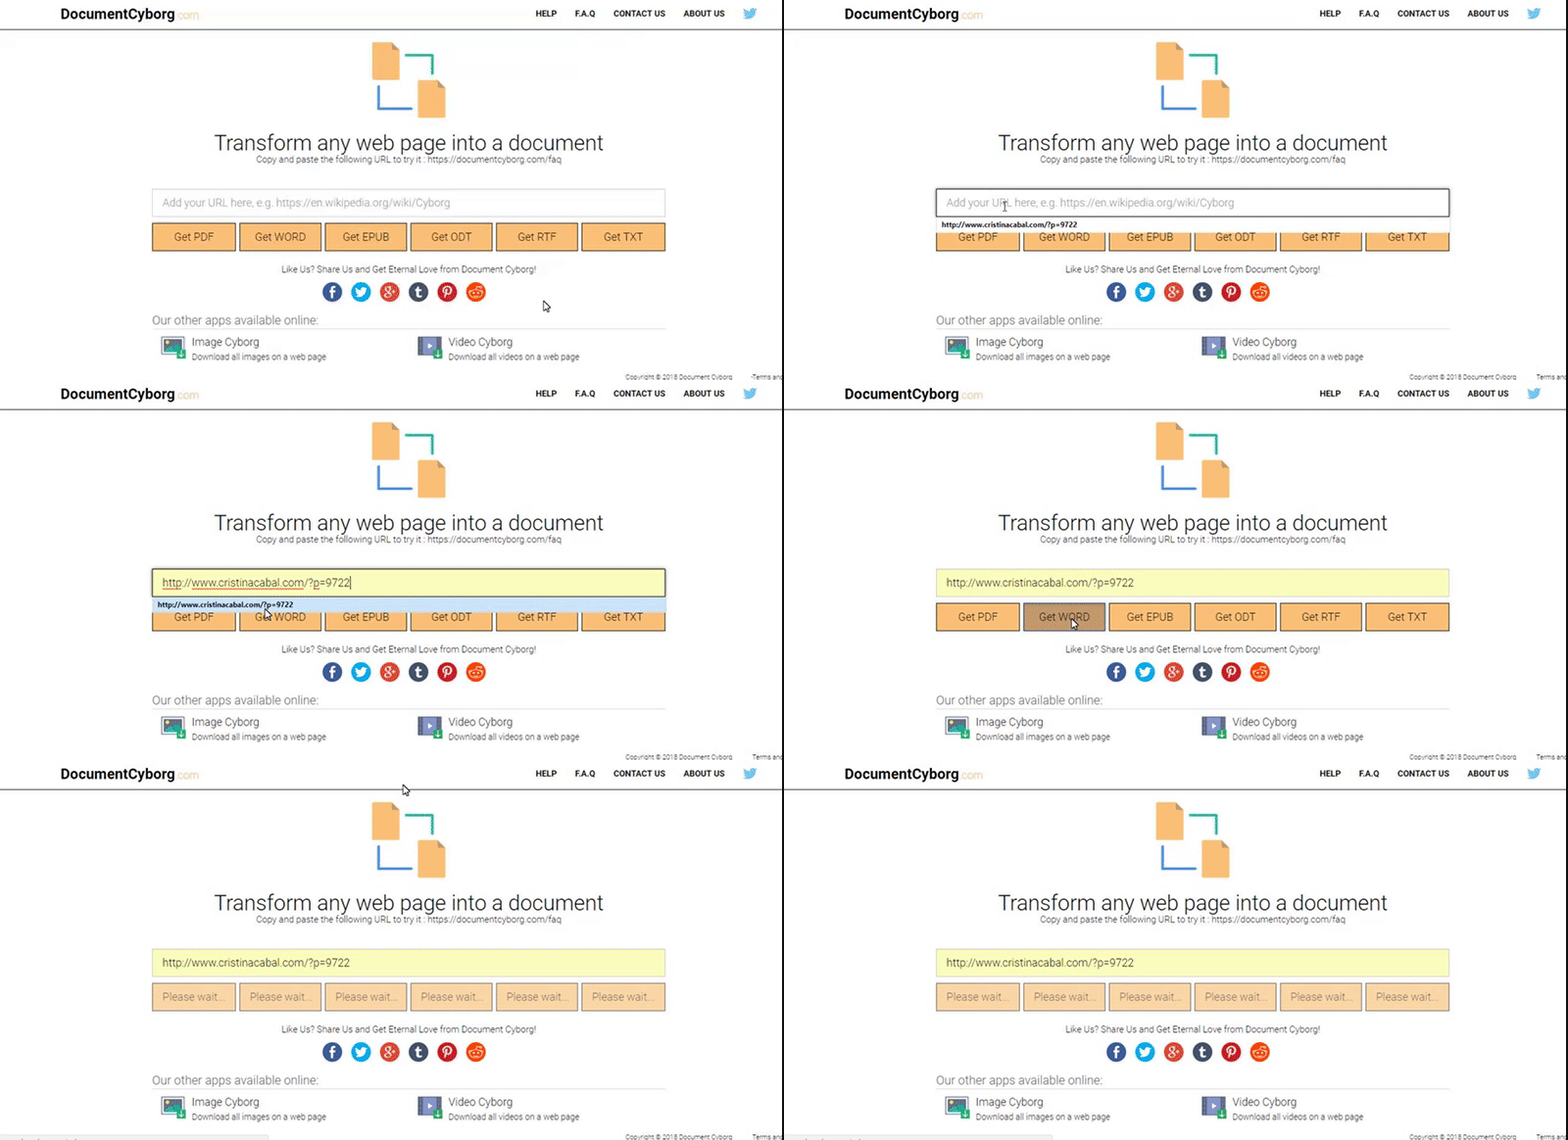
You only need to copy and paste the URL into the box, choose the format and download it and save it on your computer. You don’t even need to register.


Problem:  I have a scanned PDF or an image with some text and I want to extract the text

Solution:  www.onlineocr.net/

Onlineocr is free, simple and no registration is required. Copy/àste the URL ad then download the text as a Word document among other possibilities.


SHARING A LONG URL


Problem: I need to share with a long URL  with my students

Solution:  bitly.com/

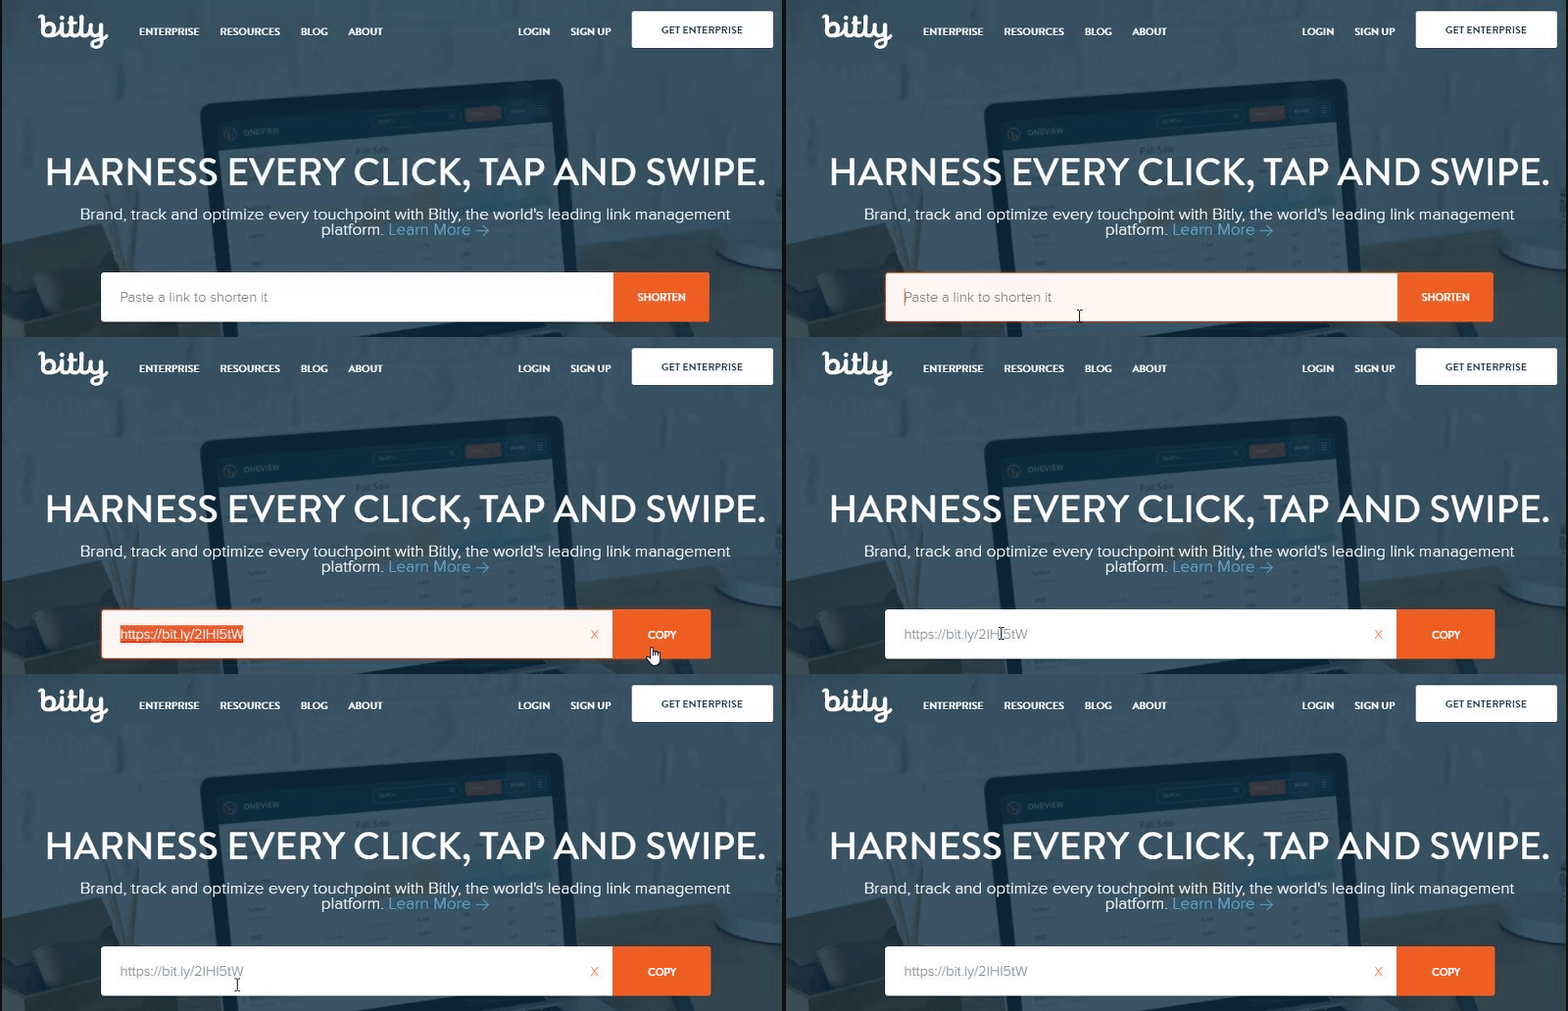
Sometimes we have to give our students a long URL which seems almost impossible to type without making a mistake. Instead of writing this long URL, use bit.ly to shorten it. To do it, paste the long link in the search box and that’s it.


PRINTING A WEBSITE


Problem: I want to print some content from a website, but I don’t want to print all the images and adverts.

Solution:  printwhatyoulike.com/

Just enter the URL, edit the page getting rid of anything you don’t want to print, and then print it.


CREATING A QR


Problem: I need to create a simple QR Code with the answer to an exercise and download the QR Code to share it with my students

Solution:the-qrcode-generator.com/

Easy to use and doesn’t require registration. Just paste your text and then save it to download it.


FREE TEMPLATES FOR POWERPOINT OR GOOGLE SLIDES


Problem: I need to find beautiful free thematic templates  to make a presentation on Google Slides or PowerPoint

Solution: slidescarnival.com/

FREE IMAGES AND VIDEO


Problem: my students are doing a project and they need to find free images and/or videos

Solution: for free images: pixabay.com/ ;for free videos pixabay.com/videos/

I hope these websites are helpful and save you a lot of time.


Licencia de Creative Commons
Este obra está bajo una licencia de Creative Commons Reconocimiento-NoComercial-SinObraDerivada 4.0 Internacional.

Ready-Made Lesson: Personal Identity

I must have been in my teens, but I vividly remember my mother telling my father that someone called James Dean had called. The funny part was not only that the famous now-long- deceased actor had phoned my dad, but the way everybody pronounced his name, /jamez dean/, as if it was the most natural thing in the world, while me and my naughty siblings couldn’t help cracking up, repeating /james dean, james dean/while in stitches. (The Spanish pronunciation of the “j” is similar to the Scottish word “loch” or the German word “Bach”)

In case you are wondering, my parents (now almost 80)  had never ever heard a word in English so everybody said /james dean/ just like that and never gave it a second thought. We, me and my three siblings, just liked fooling around. I know better now!! 🙂

About the lesson:

In this lesson, aimed at B2 students and above, students discuss their names and their personalities through some engaging activities.

In part 2, you have the possibility of asking students to use their own devices and complete the task in class or alternatively set the task for homework.


Part 1. Talking about your name

A video-based listening activity

Tell students they are going to watch a short extract from the Graham Norton show, where the actresses Meryl Streep and Nicole Kidman discuss their birth names. Play from 0:00 until 2:50.

Introduce: 

  • To be named ( after someone)
  • To name someone
  • A pet name
  • A middle name
  • A nickname

Procedure:

Play the video once and ask students some comprehension questions. Play the video a second time if necessary.

  1. Meryl Streep was named Mary at birth. How did she end up being called Meryl?
  2. Is she happy about her surname? How does she wish it to be different?
  3. Why is Nicole Kidman called Hokulani? Who is she named after?

Discussion questions:

  • Are you happy with your name? Why (not)?
  • Does your name have a meaning? If so, what does it mean?
  • Do you have a middle name? What is it?
  • Do you have a nickname? If so, what is it and how did you get it?
  • If you could change your name would you? What would it be? Why?
  • U2’s lead singer, Bono, called his daughter Memphis Eve and Gwyneth Paltrow’s daughter is called Apple. Do you know any “normal people” with unique baby names? What about you, do you prefer giving your child a more traditional name or a unique name?
  • In some countries, when women marry they take their husband’s last name? What do you think of this?

Part 2. Talking about your personality

In this second part, we are going to revise and learn some more complex personality adjectives.  To introduce personality adjectives we are going to use a website which analyses your personality based on the numerical value of your name. Whether students believe in it or not should be irrelevant, we are only interested in language acquisition here.

The warm-up

As this lesson is aimed at upper-intermediate students and above, students will have some prior knowledge of the most common personality adjectives, at least enough to get them started.

Choose any activity from 10 Games and Activities to Practise Personality Adjectives, a very successful – if I might say so-blog post I wrote last year

Homework.  The Website.

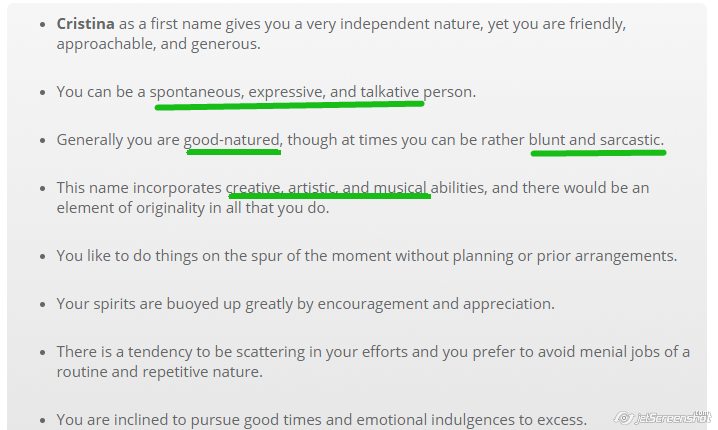
Ask students whether they think a name can shape their personality and refer them to this website where they’ll have to write their name in the space provided and read about their personality.

You can always ask them to read their horoscope, but this is “old news”, so I thought this might better spark students’ interest.

At home, students go to the website and find out about their personality based on their names. They look up any new words they don’t know, especially personality adjectives, as they will need to share this analysis with their classmates and say whether they agree or disagree with it, giving reasons.

Gathering Feedback

This activity can be done in a traditional way i.e board and chalk. Students call out an adjective and you write the personality adjective on the board.

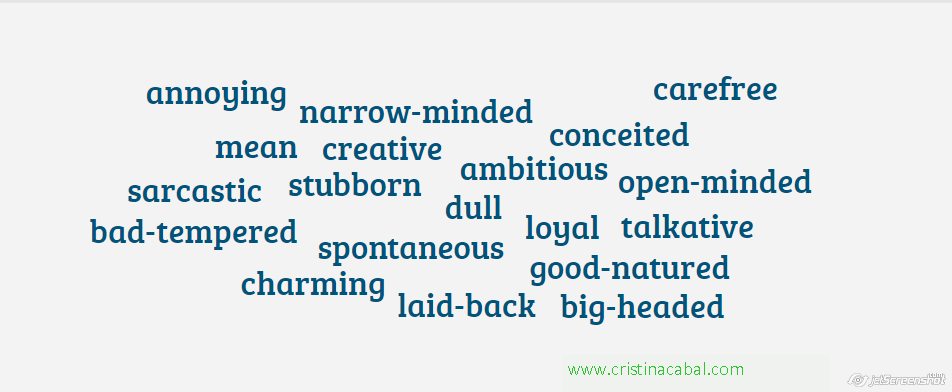
Again, with the aim of creating a more engaging activity, I’m going to use a free online tool called “Answergarden” to get instantaneous feedback. The tool is very easy to use. Here’s a tutorial in case you need it, but it really has a very friendly intuitive interface making it very easy to use, even for those teachers who are not too tech-savvy. The app takes students answers and creates a word cloud that can be exported or embedded.  Students will need to use their own devices but, if necessary, every three students can share one.

Once you have created the word cloud in Asnwergarden, use the overhead proyector to display it and ask volunteer students to explain the meaning of the adjectives and say whether they think it is positive, negative or neutral.

Below, an example of a word cloud created with Answergarden.

Speaking

Put students in pairs and ask them to share their name report from the website and say whether they agree or disagree with such analysis.

Ask them to discuss the following questions.

  • What kind of people do you usually get along with?
  • What kinds of personality traits do you hate?
  • Is your personality more similar to your mother’s or father’s?
  • Do you think we are born with our personalities, or do we develop them because of what happens to us?
  • Do you tend to fall in love with good looks or with a great personality?
  • Does one person’s character affect the personalities of the surrounding people? Are you influenced by anybody you know?
  • Does birth order affect personality? What qualities do a first-born child, a last-born and an only child have?

The Quiz: As Free as a Bird. 

Let’s go the extra mile! In this quiz, you’ll find more colourful ways to talk about someone’s personality. In order to learn them, I suggest taking the quiz two or three times, the last time checking if just by looking at the picture students can remember the simile.

After doing the quiz, you can always ask some follow-up questions like:

Do you know anybody who is as stubborn as a mule?

Enjoy!

A Project-Based Learning Activity: Unusual Traditions

These past few days have been hectic with lots of exams to be written and then marked, plus all that red tape I can’t stand involving end-of-term exams. To top it all, my old friend the flu decided to pay me a visit. Very timely.  Right now, thank goodness, deadlines have been met and everybody seems to be winding down for the holiday season. Me, too. So, that’s probably going to be the last blog post of the year.


  • Organisation: Group work
  • Level: B2 and upwards
  • Materials: tackk tutorial here (optional)
  • Aims: to encourage collaborative work by giving students the challenge of researching, selecting and presenting a project about unusual traditions around the world.
  • Online tools: Padlet and Tackk

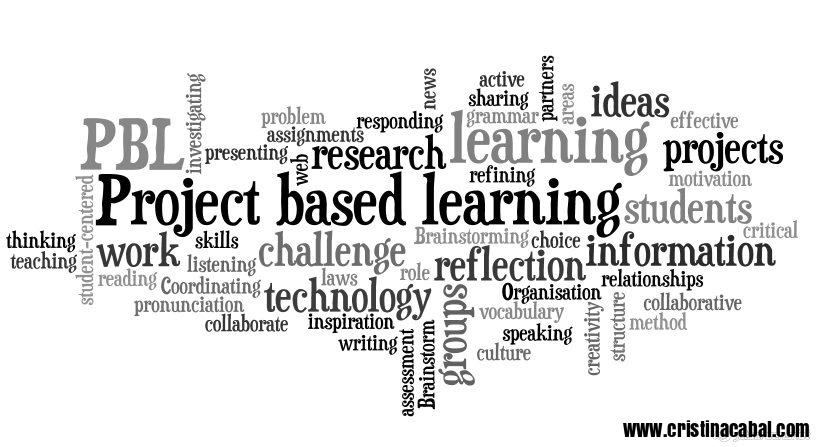
Project Based Learning- What is it?

It is a student –centred teaching method in which students acquire knowledge and skills by investigating and responding to a complex question, problem or challenge.

PBL is an active learning style which inspires and motivates students because they take an active role in their learning process and experience success in their own learning. The role of the teacher here is of mere facilitator and coach.

In PBL students are encouraged to work in pairs or in groups, which is also good because it creates a friendly atmosphere which is a boost to their motivation and creativity.


Project-based learning structure

  1. Choosing the problem or challenge
  2. Organisation
  3. Brainstorming
  4. Coordinating
  5. Sharing learning and refining
  6. Presenting and sharing

1.Choosing the problem or challenge.

For this project, students will be rising to the challenge of presenting information about unusual customs in the world.

2. Organisation.

My classes are quite large so students will work in groups of 4 or 5.

On the board the class as a whole decide on 4 or 5 areas, they want to talk about. There should be the same number of areas as groups you have. Each of these areas is assigned to a group to research.

In this project

  • Relationships
  • Festivals
  • Law
  • House and Home
3. Brainstorming

This step is done entirely at home with the help of an online collaborative free tool. My students are adults, some as old as 70,  and they only see each other in class  twice a week, so it was important to provide them with some kind of free online tool  they could use to brainstorm ideas, share them with the members of the group and organize their project (timing, visuals, specific assignments..etc). I used a Padlet, a well-known collaborative tool, which is very easy to use, something really important as some adults are reluctant to use new technologies. Each group was assigned a different Padlet and given a week to do research on the internet and post on Padlet their ideas.

Below is the Padlet the group”House and Home” used.

Hecho con Padlet


4. Coordinating.

This stage might take the first or last 10 minutes of your lesson. Once they have shared their ideas on Padlet, in class they decide on the number of traditions they are going to present, who is going to do what, the order in which they are going to present the information and the visuals or videos they are going to use.

5. Sharing learning and refining

In the next class, allow students time to get together in their groups and share their drafts. Offer help and guidance but ask students to help each other by swapping their drafts within their group  to improve and proofread their written work.

6. Presenting and sharing

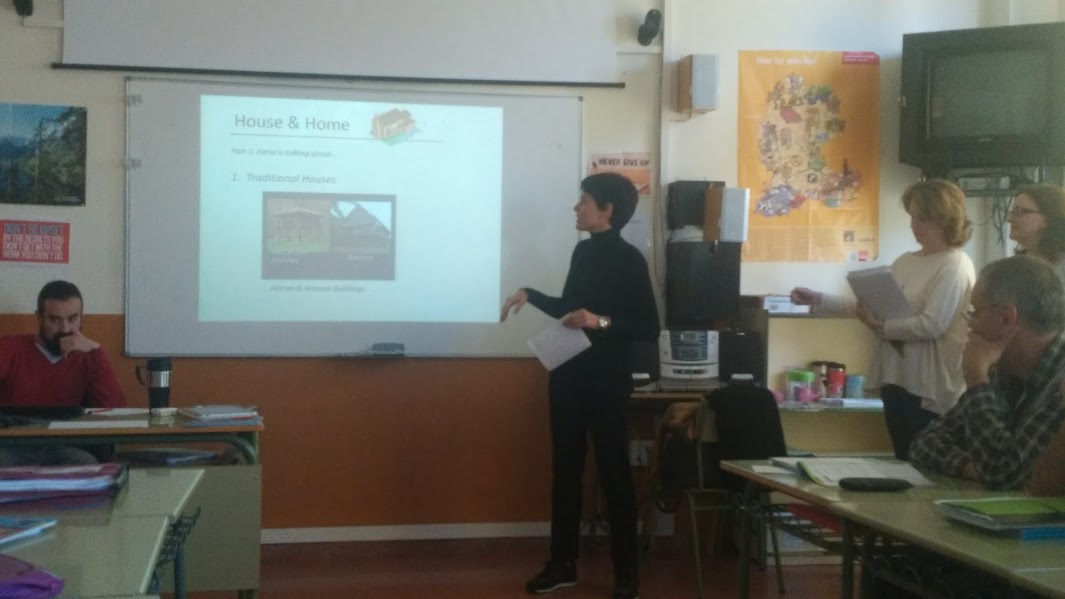
Agree with the students on the order of the groups and let the show begin. Below is a picture of one of the groups on stage.

Sharing it with the world is also important. Here’s how we did it. Again, we used a free online digital tool called Tackk.com, which allows  you to beautifully showcase your projects. I gave my students this simple tutorial to help them get familiar with the tool.

Here’s the tackk my students have created.


Rewordify: a Free Online Tool to Simplify Difficult English

Today I want to share with you an amazing free online tool which has a lot of potential for learning English.

Rewordify simplifies difficult English and helps you understand what you read.

How this tool works

  • Go to Rewordify.com
  • Enter sentences or whole paragraphs difficult to understand into the yellow box at the top of the page. You can also enter a web site URL.
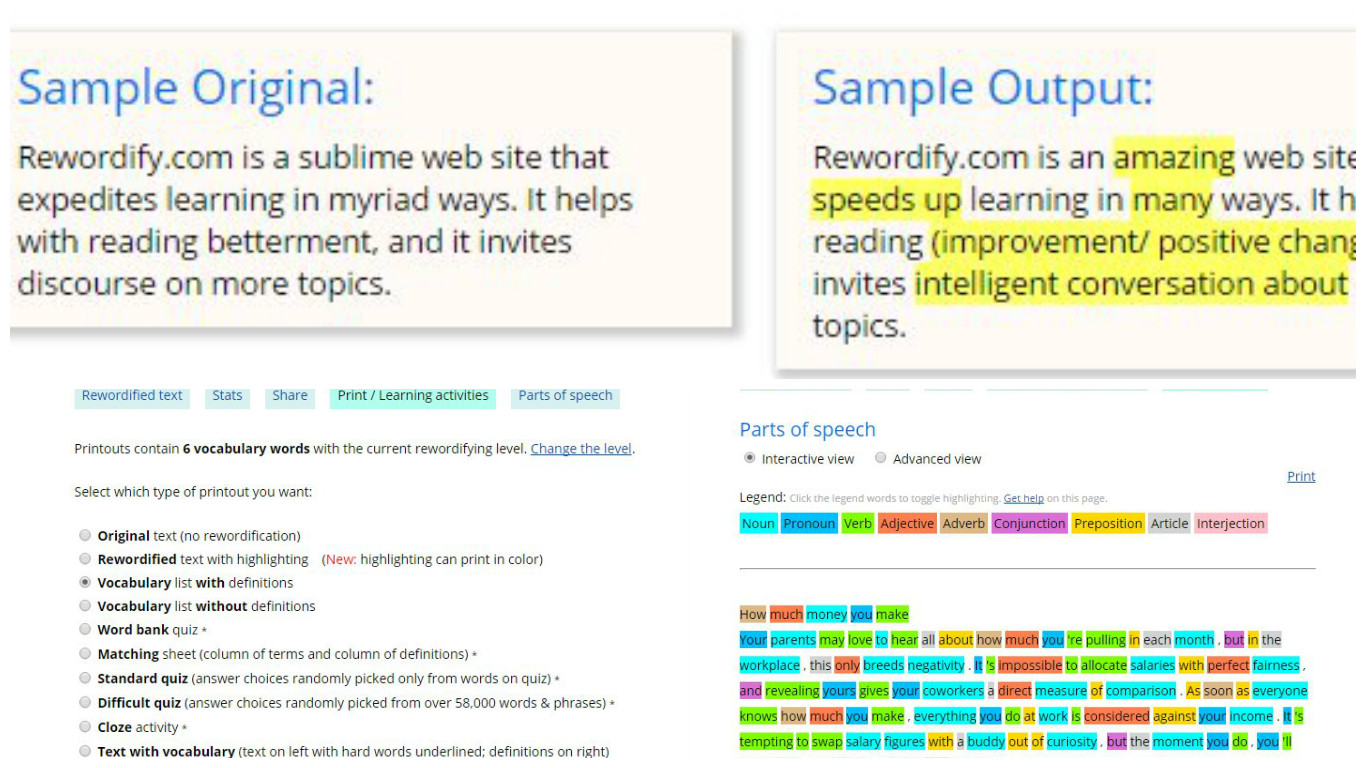
  • Click Rewordify text and you’ll instantly see an easier version of the text providing clear, easy-to-understand definitions. (see picture below)
  • The reworded words are highlighted in yellow— click them to hear and learn the original harder word.
  • You can also click the non-highlighted words to read their definition.
  • Click the Print button and choose the type of printout you want. You can print the original text, the rewordified one, vocabulary lists with definitions and without them, a word bank quiz, a standard quiz or a difficult one… etc (see picture below)
  • By clicking the Parts of Speech button you’ll see nine part of speech categories (see picture below).You can turn on and turn off the highlighting of each part of speech by the words in the header. For example, if you only want the nouns and verbs highlighted, click all other parts of speech in the header

You don’t even have to register but if you free register:

  1. You can change how the highlighting works to match the way you learn
  2. Store, edit and delete your documents
  3. Share your documents
  4. Save vocabulary lists

Up for a little game?

And if after working hard on vocabulary you still feel up for a little challenge, Rewordify has created two word games for you

  • Reword where you’ll have to select the correct definition for the hardest words in English, as fast as you can.
  • Difficult Hangman. An old favourite but with hard words.

Thanks for reading!