Step 1. Look at the mosaic below with the faces of some well-known celebrities and, bearing in mind what you know about them, write a description based on their personalities. Make sure you use personality adjectives. Do not mention the name of the celebrity you are describing as your classmates aim will be to find out who you are describing. Please, don’t be too flattering or too hard on people. Remember that “not all that glitters is gold”.
Important: the description should be written in the way of a comment to this post. How to do it? at the end of the post, click No Comments (or 9 Comments if hopefully I have already published nine comments), leave the comments in the right field, repeat the required anti-spam word and click Submit Comment.

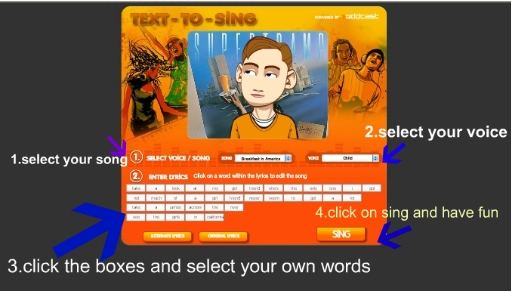
Step 2. Let’s have some fun. How would you fancy converting text to music? This funny programme allows you to type any words and it sings them back to you. Try typing some personality adjectives and listen to them sung by different people. The site is called Text to sing.

Step 3. Exercises. Do the following online exercises .
Exercise 1 Exercise 2
Step 4: Writing. How do you see yourself and how others see you? This task, as you can imagine, requires mature students as it involves writing and reading about you. First, students find a classmate they know pretty well. Secondly, students write about their own personality and then, about their friend’s personality. Encourage students to explain and exemplify why they have chosen a certain adjective to describe them and also to describe a negative trait in their personalities as well as in their friend’s. Students pair themselves and compare what they have written.
Step 5. Singing Hand in my pocket by Alanis Morisette


 classroom. But, of course!.. 😉 we have one laptop for the English department but… it’s not always available. So, we have to take whatever laptop is available from other departments. The problem is that not all laptops have programmes installed that can read Flash or whatever format your video is in so the innocent teacher, unaware of this fact, walks into his classroom with a video downloaded from the Internet ready to be played, some questions about the video ready to be answered and some hours and a lot of effort put into this task and realises that the laptop cannot read his video format. Swearing and bumping your head against the wall is not a good option, trust me on this one, I have already tried it, so what’s left?
 I should maybe have to explain that although education is compulsory in Spain until you’re 16 ,books are not free; not even kept at the school and handed from student to student . So you can only guess at how much publishing companies earn out of textbooks.

